I Learned How to Make This Cute Avo-Shaped Ring Holder in One Day
Instagram: @getcrockd
Creating an avocado-shaped jewelry and ring holder from a clay slab is a fun and creative project that adds a unique touch to your accessories. Here’s a step-by-step guide to help you craft this adorable piece.
Step 1: Preparing Your Clay Slab
Start by rolling out your clay slab using the method we discussed earlier. Make sure the slab is even and free of air bubbles. After letting it dry a bit to firm up, use a spatula to smooth out any cracks or imperfections on the surface. This will ensure your avocado tray has a nice, clean finish.
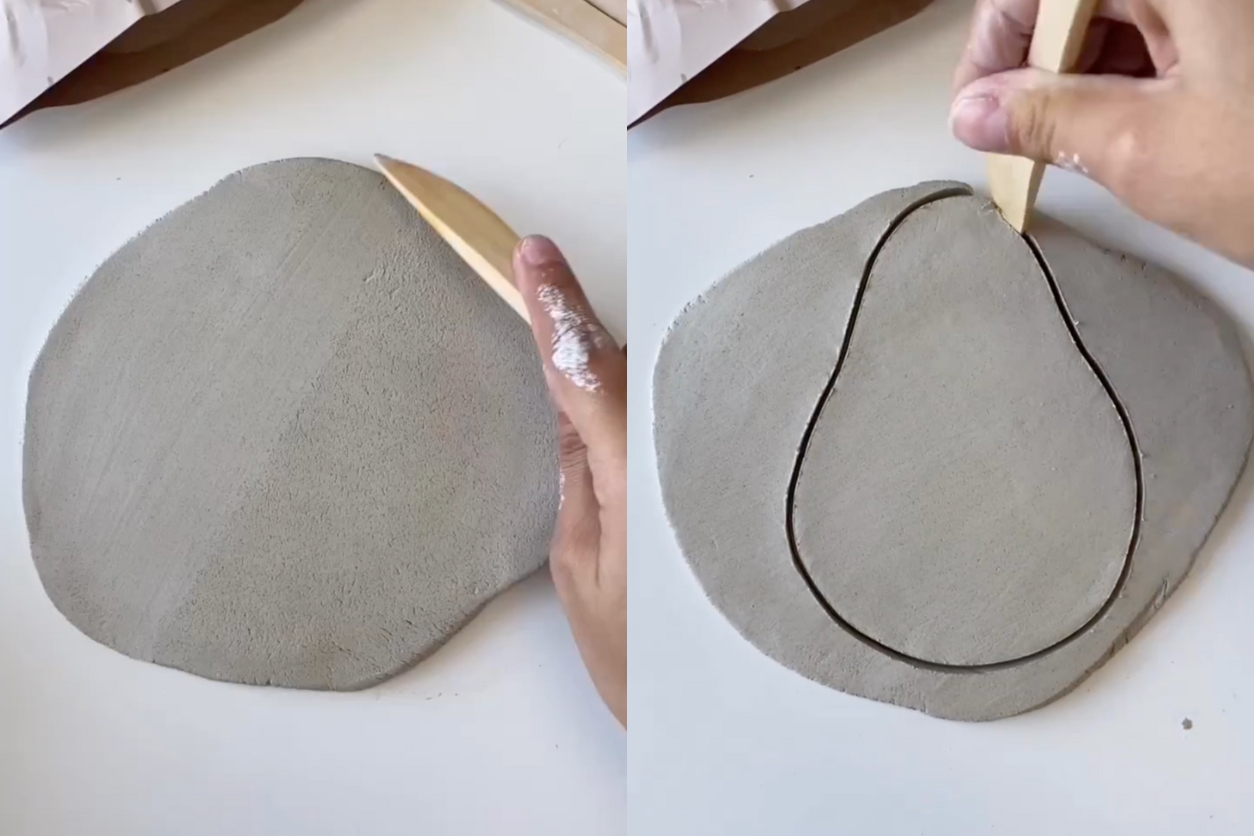
Step 2: Cutting the Avocado Shape
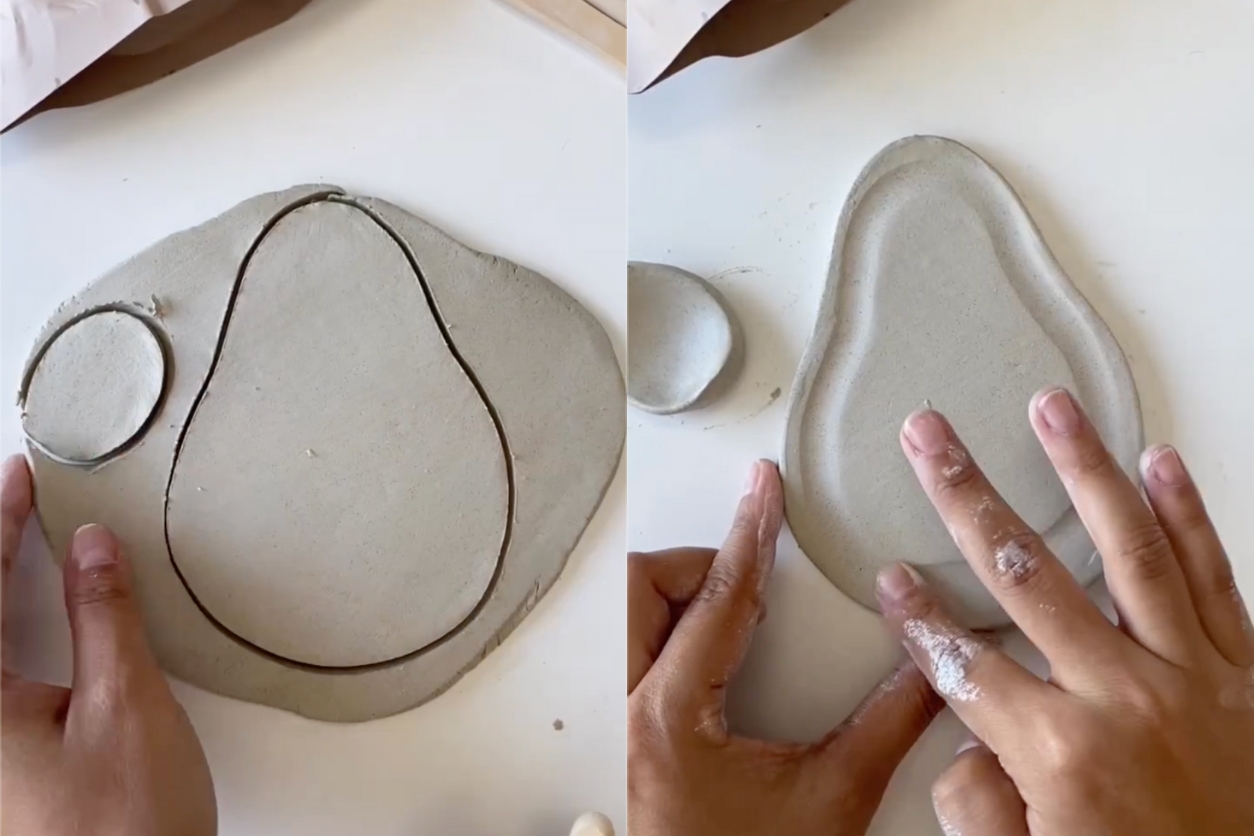
Using a wooden boxwood tool, cut out the shape of an avocado from the clay slab. You want the shape to be large enough to hold several pieces of jewelry. Next, cut out a small oval shape for the avocado pit. This will serve as a small tray within your larger tray.
Step 3: Shaping the Pit
Now, gently mold the avocado pit into a tiny tray-shape using pressure between your thumb and index finger. The goal is to create a small, curved space that can comfortably hold a couple of rings. Use a serrated rib or a natural sponge to smooth out the edges of the pit, ensuring there are no rough spots.
Step 4: Adding Texture to the Avocado
With your index finger, lightly trace the inner edge of the avocado shape you just cut out. This will create a slight indentation that adds texture and also forms a recessed area for holding necklaces or other small items. Be gentle but firm to achieve a nice, even groove around the inner edge.
Step 5: Buffing and Smoothing
Once you have traced the inner edge, take the time to buff and smooth out all the edges of your avocado tray. This step is crucial for giving your tray a polished look. Make sure there are no sharp or uneven areas.
Step 6: Assembling the Pieces
Carefully attach the pit to the avocado base using the slip-and-score method. Score the areas where the pit will attach to the base, apply slip, and press them together. Use a flat spatula to press gently on the inner seams, ensuring the pieces are well-adhered. Smooth out the seams on the outside to make it look neat and even.
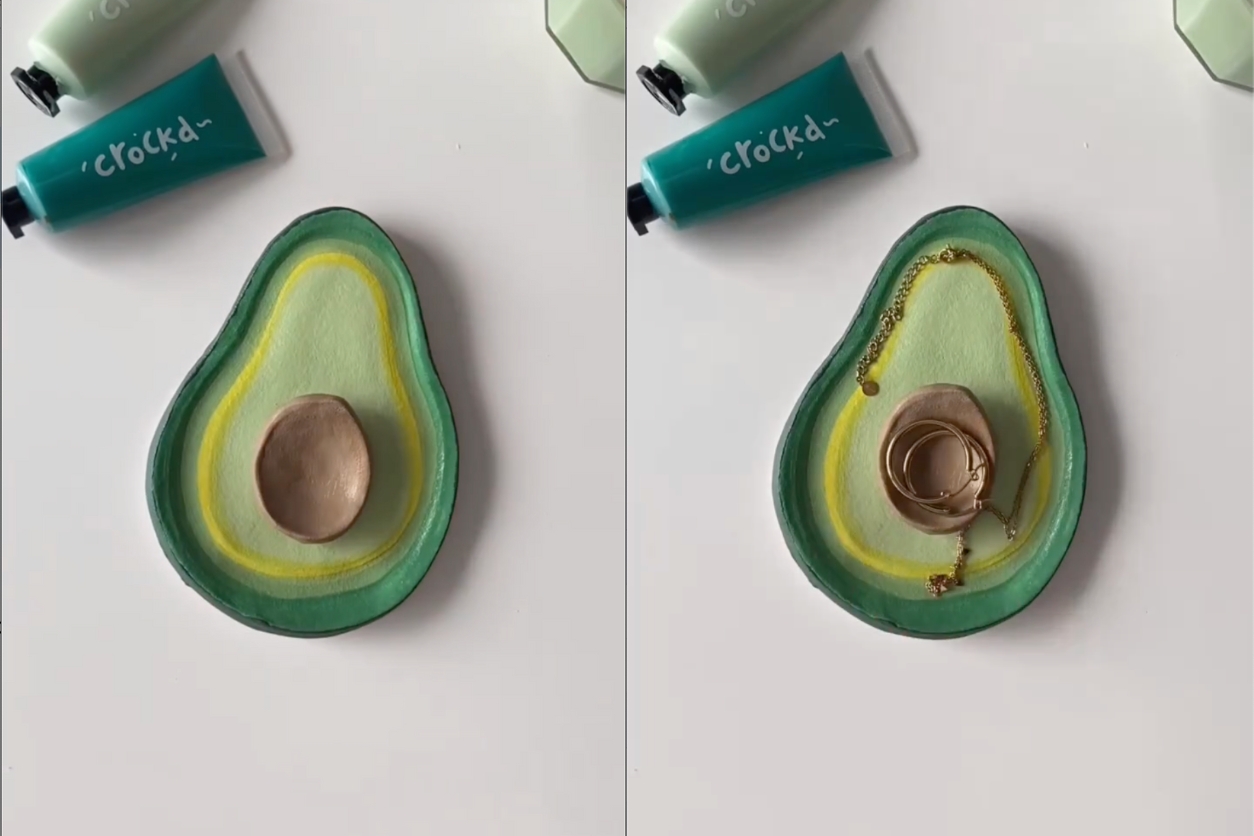
Step 7: Painting Your Ring Holder
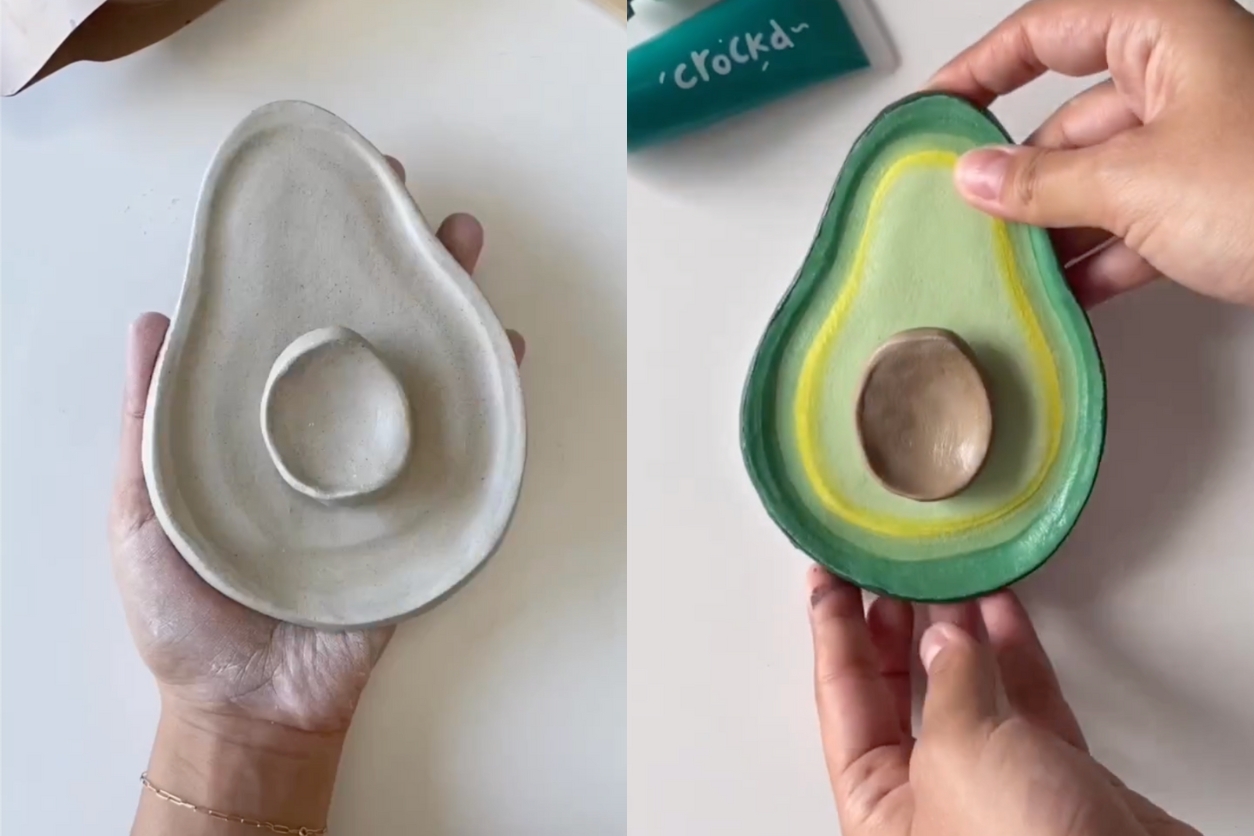
Allow the entire piece to dry thoroughly before painting. This will prevent any warping or cracking. Once dry, start by painting the pit a dark brown. For the avocado tray, paint the border a dark green. Next, paint the inside of the avocado tray a lighter shade of green, adding a hint of yellow near the inner border to mimic the look of a real avocado.
Related: How To Make Polymer Clay Earrings
Step 8: Finishing Touches
After the paint has dried, you can add any final touches or details to your tray. This might include adding a bit more texture or a protective glaze if desired. Once everything is dry and set, your avocado jewelry tray is ready to use.
This avocado jewelry tray is not only a practical piece for storing your rings and necklaces, but it’s also a charming decor item that brings a touch of fun to your space. Enjoy your new creation, and feel free to experiment with different shapes and colors to personalize it even more.
Trusted Insights from Artists
At Art Life Today, our passion for arts and crafts is at the heart of everything we do. We understand that the right tools and materials can make all the difference in your creative projects, so we take our responsibility as reviewers seriously. Our goal is to help you discover the best products that will inspire your creativity and bring your artistic visions to life.