How To Make Polymer Clay Earrings With a Pasta Machine

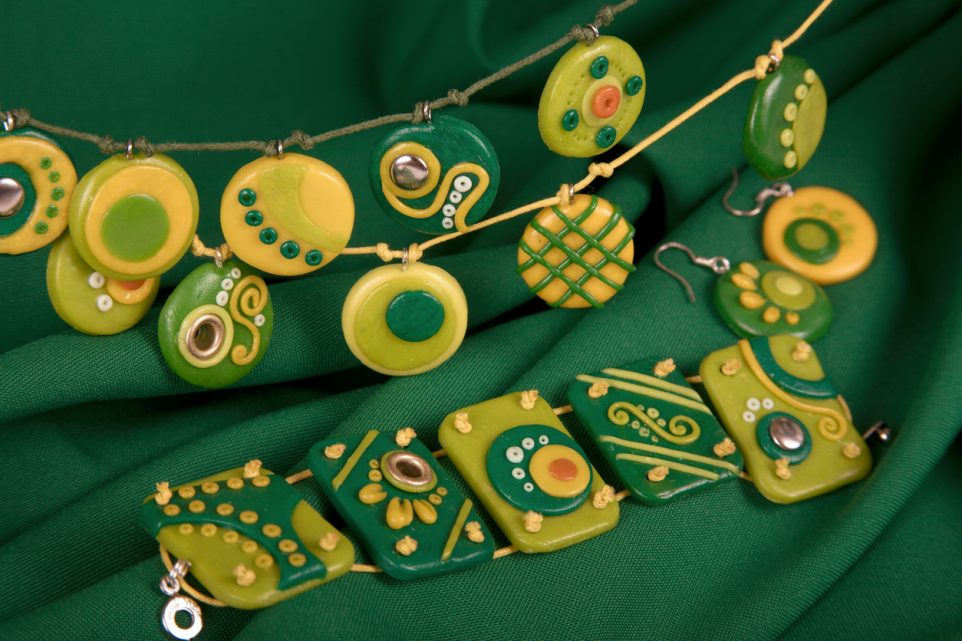
Polymer clay earrings have been all the rage on social media lately, and I thought I’d share a detailed guide on how you can make your own. This isn’t just a quick project—it’s a fun and creative process where you can really let your artistic side shine. Plus, making your own jewelry means you get to wear pieces that are totally unique to you.
What You’ll Need
Before we get started, let’s gather our supplies. Here’s everything you’ll need:
- Cutting Mat or Ceramic Tile: To protect your work surface and make cleanup easier.
- Pasta Machine or Acrylic Rolling Pin: For conditioning your clay.
- Blade: To cut the clay.
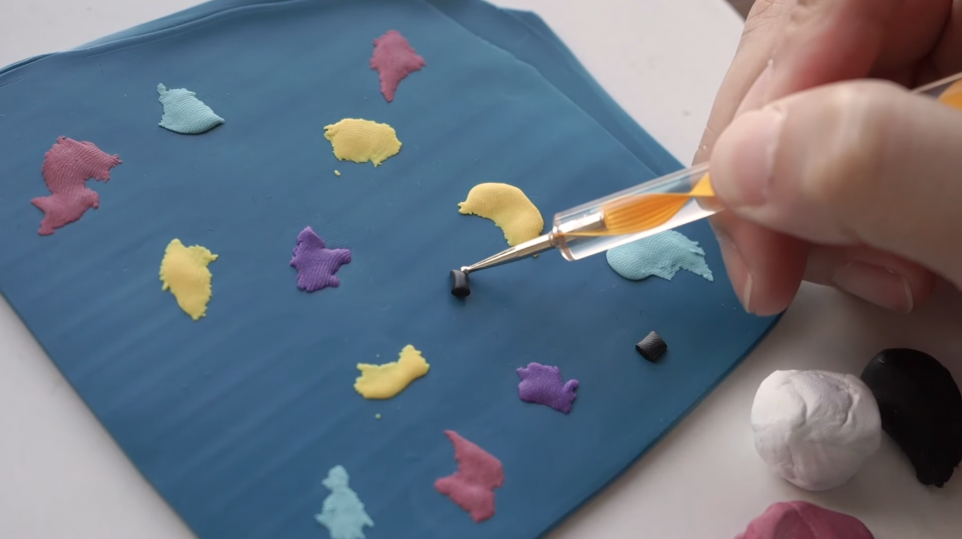
- Dotting Tool or Old Chopsticks: For creating small details and picking up pieces.
- Shape Cutters: To cut out your earring shapes.
- Sandpaper: For smoothing edges.
- Oven Thermometer: To ensure the correct baking temperature.
- Pliers: For working with the earring findings.
- Findings: Jump rings, hooks, posts, and backings.
- Polymer Clay: I recommend the Sculpey line—Premo for bases and Sculpey 3 for designs.
Conditioning the Clay
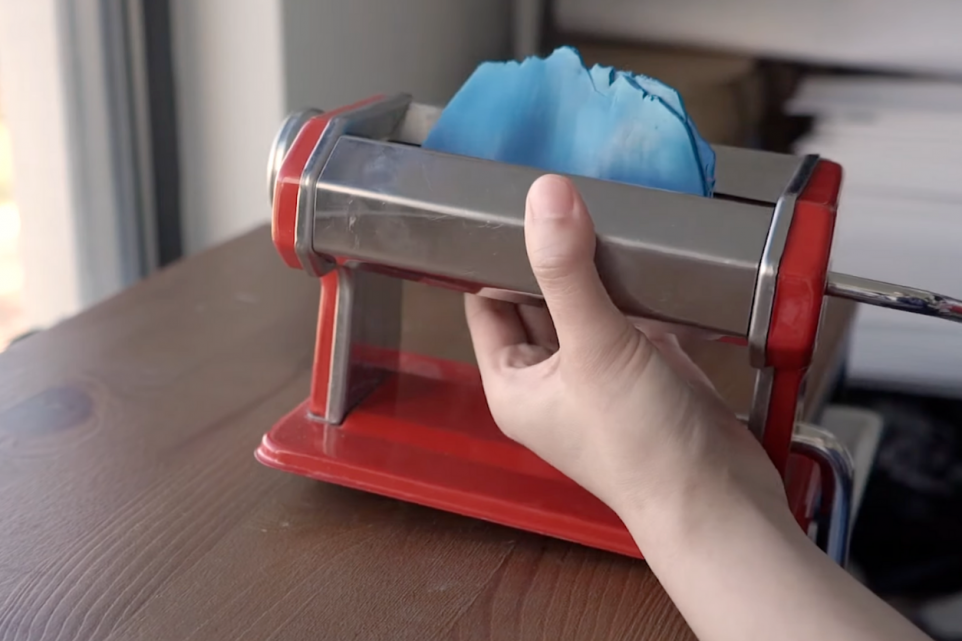
First things first, we need to condition the clay. Choose the color you want for your base and run it through the pasta machine. If you don’t have a pasta machine, an acrylic rolling pin works just as well. This step is essential as it removes air bubbles and makes the clay more workable. Keep folding and rolling the clay until you achieve a smooth, even surface. Skipping this step can lead to breakage or air bubbles after baking, so don’t rush it.
Designing Your Earrings
Now, let’s get to the fun part—designing! I prefer using Sculpey 3 for this because it’s easier to mold with your hands compared to Premo. For a simple yet stylish look, go for abstract designs with blobs, patches, lines, and dots. Mix your own colors and get creative! Use your blade to cut pieces and the dotting tool to pick up tiny bits that are hard to get with your fingers.
Cutting and Shaping
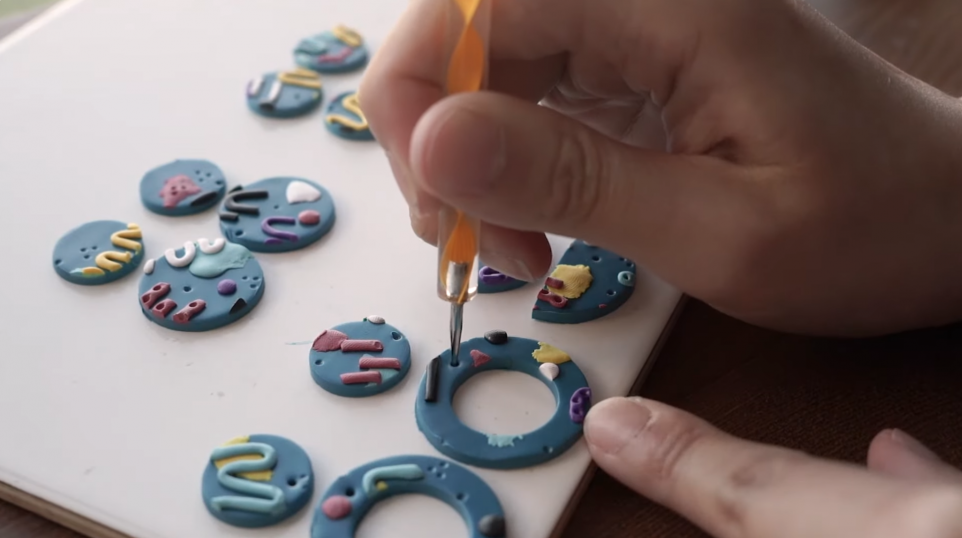
With your clay slab ready and designed, it’s time to cut out the shapes. I like to use round shape cutters, but feel free to experiment. The key is to maximize the design, so you don’t waste any of your artwork. You can also cut some pieces in half or into unique shapes for added variety.
Making Holes for Findings
Before baking, poke holes for the jump rings. Doing this now is much easier than drilling holes later. Use your dotting tool to make small holes, and make them slightly bigger to ensure the jump rings fit easily.
Baking the Pieces
Baking can be tricky, so here’s how to do it right. Preheat your oven to 130 degrees Celsius and use an oven thermometer to check the temperature. You can bake your pieces on a ceramic tile or a baking tray with baking paper. I usually bake mine for about 50 minutes, but check on them every 5-10 minutes to prevent burning. Proper baking ensures your pieces are strong and durable.
Finishing Touches
Once the pieces have cooled, it’s time to sand the edges. If there are large chunks, trim them off first with your blade. Sanding smooths out rough edges and gives your earrings a professional finish.
Assembling the Earrings
Finally, let’s put the earrings together. Use your pliers to open the jump rings and connect the pieces. Adjust as needed to make sure everything hangs correctly.
Tips and Tricks
- Finding Supplies: Check out your local hardware store for wires. Copper, steel, and aluminum are great options.
- Experiment with Colors: Mixing your own shades can give you unique and stunning results.
- Be Patient: Take your time with the design and assembly process—it’s all part of the fun.
And there you have it! Your very own pair of polymer clay earrings.
Trusted Insights from Artists
At Art Life Today, our passion for arts and crafts is at the heart of everything we do. We understand that the right tools and materials can make all the difference in your creative projects, so we take our responsibility as reviewers seriously. Our goal is to help you discover the best products that will inspire your creativity and bring your artistic visions to life.


