5 Cute Beginner Ceramic Projects to Try
Ceramics is a wonderfully accessible art form that invites creativity and self-expression. For those curious to start working with clay, starting with simple projects can be a great way to build confidence and skill. Here are five cute beginner ceramic projects that are perfect for those just starting their clay journey. Each project is designed to be straightforward and easily personalized, no matter what materials you choose to use! Have fun while creating functional and decorative pieces.
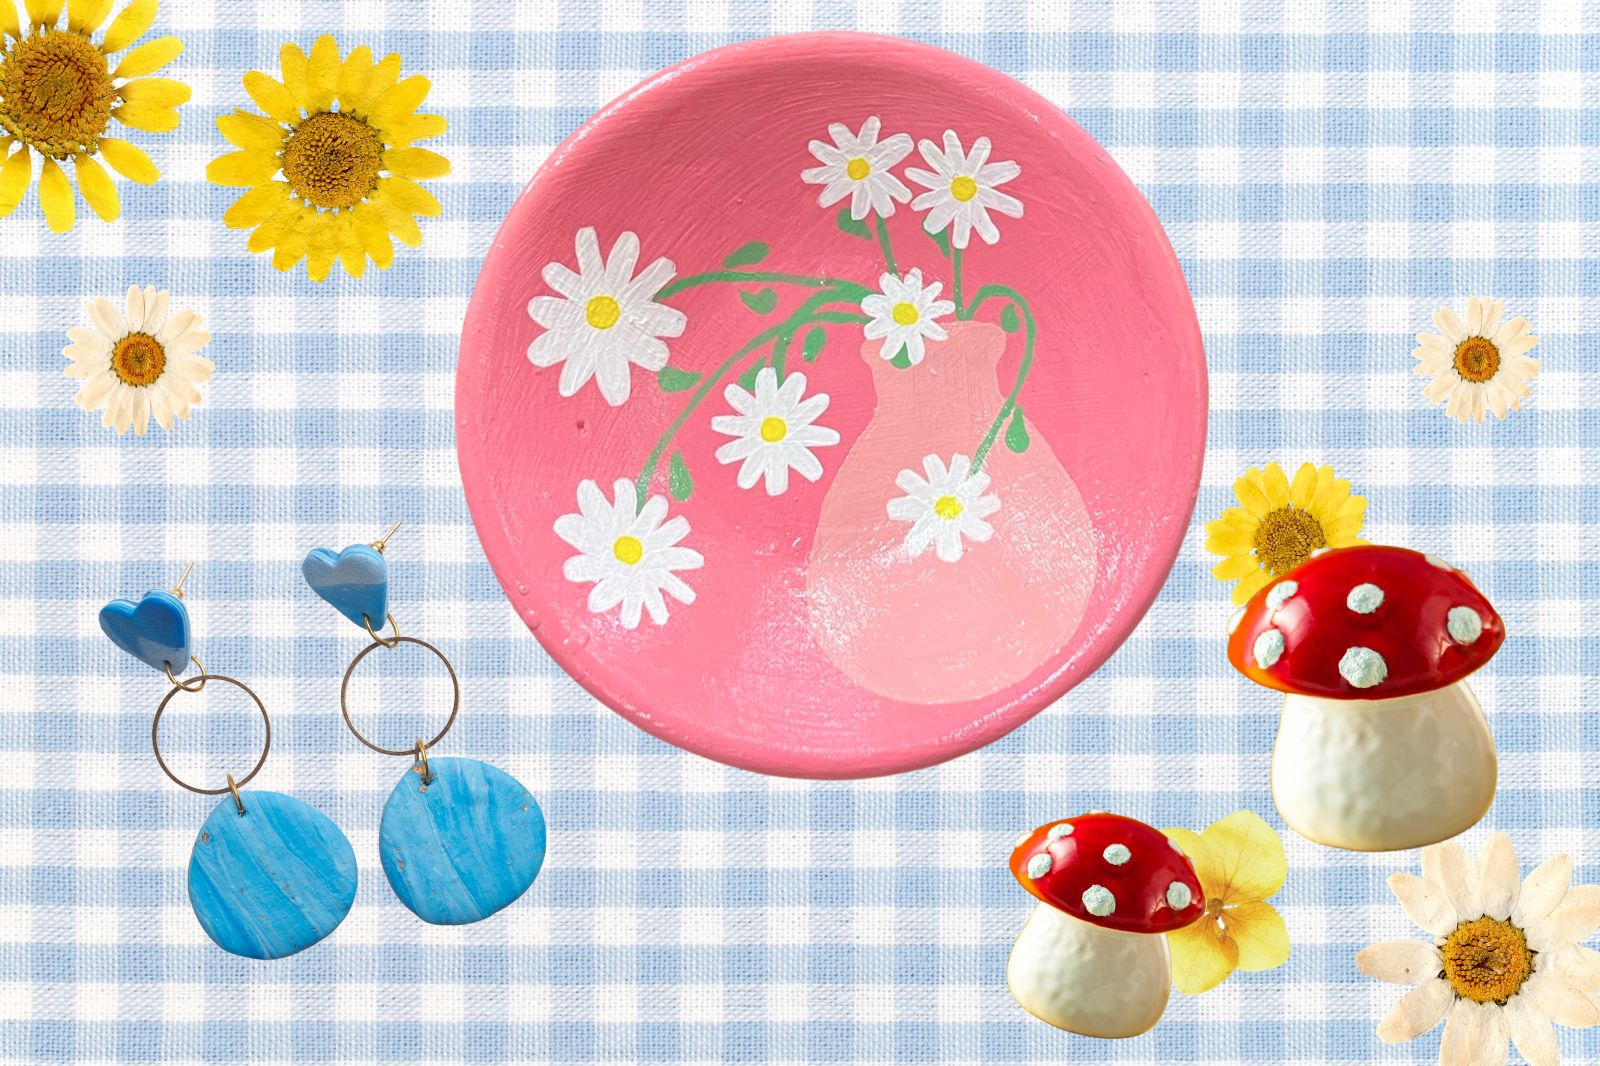
Jewelry Tray
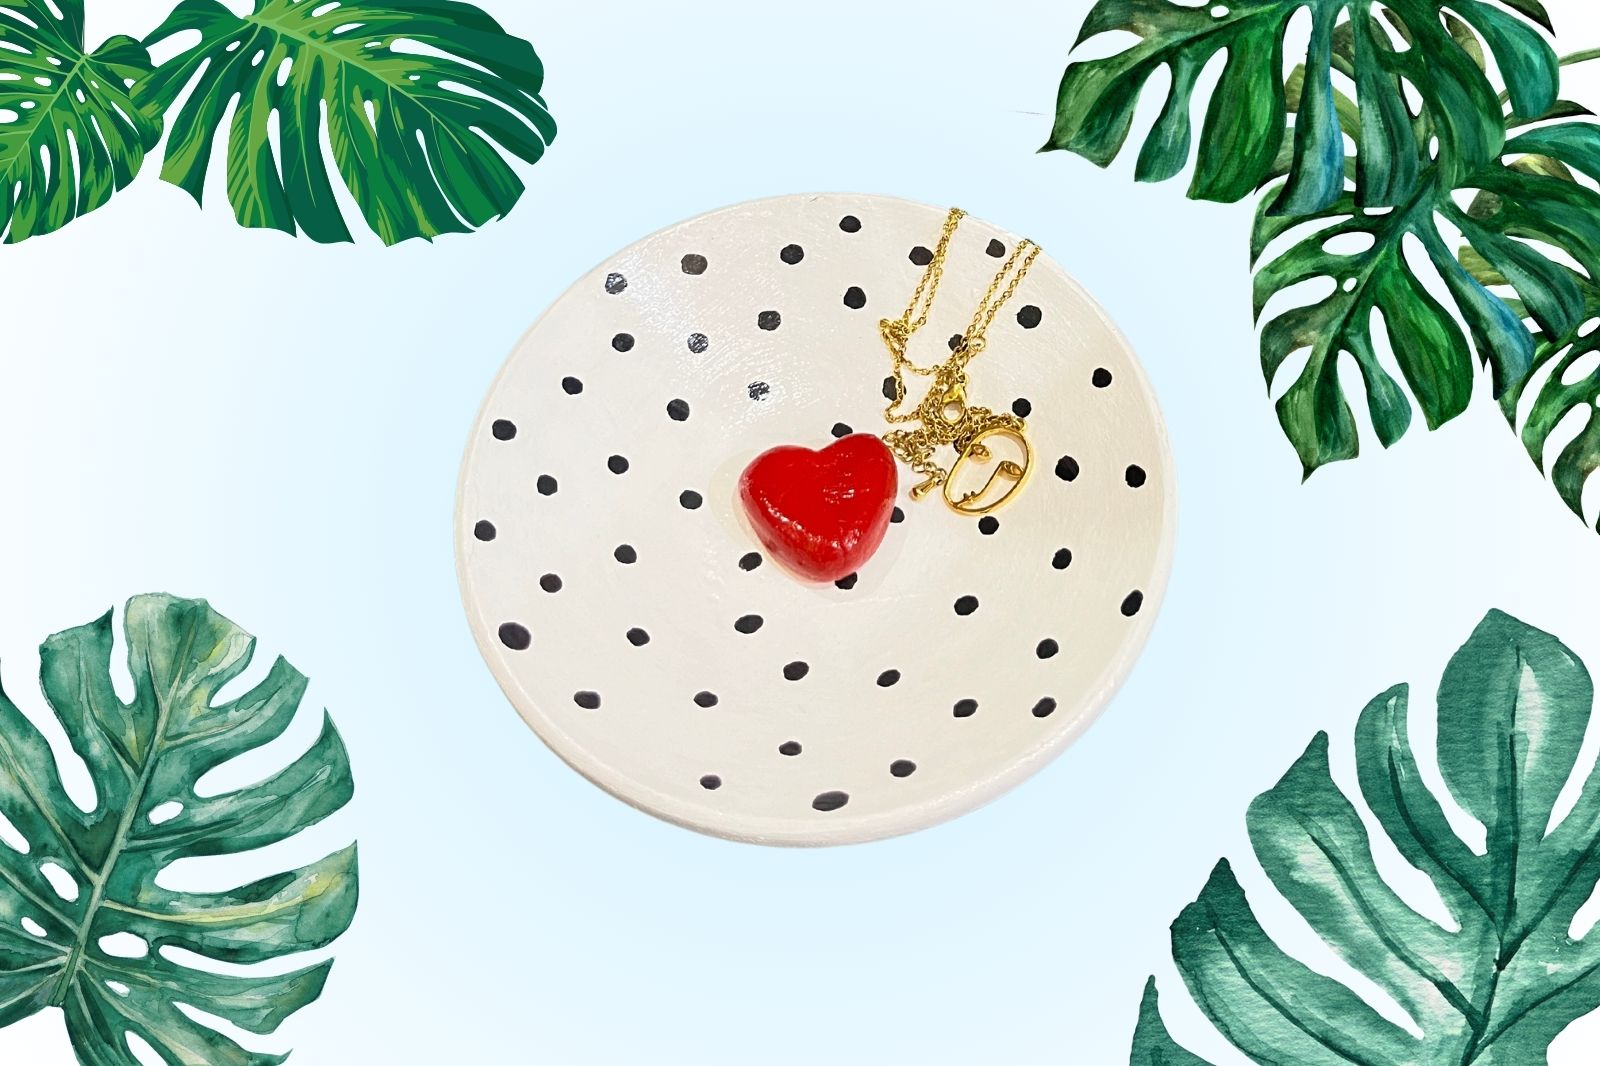
A jewelry tray or trinket dish is a fantastic beginner project! It’s a simple item that you can use to store rings, necklaces, and other accessories, making it both practical and a great way to showcase your artistic skills. You can choose to work with air-dry clay or oven-bake clay. Each one has their unique properties. You can also make homemade air-dry clay easily with a few household materials!
Materials Needed:
- Air-dry clay or oven-bake clay
- Rolling pin
- Knife or clay cutting tool
- Bowl or round object to use as a mold
- Paint or glaze (optional)
Instructions:
- Roll Out the Clay: Start by rolling out a slab of clay to about 1/4 inch thickness using a rolling pin.
- Shape the Tray: Use a bowl or round object to cut out a circle from the clay slab. This will be the base of your tray.
- Create the Edges: Gently lift the edges of the circle to form a shallow dish shape. You can use your fingers or a small tool to smooth and shape the edges.
- Add Personal Touches: Decorate the edges or surface with patterns, textures, or impressions. You can use stamps, tools, or even the end of a paintbrush for this.
- Dry and Finish: Allow the clay to dry completely, following the manufacturer’s instructions. Once dry, you can paint or glaze the tray if desired.
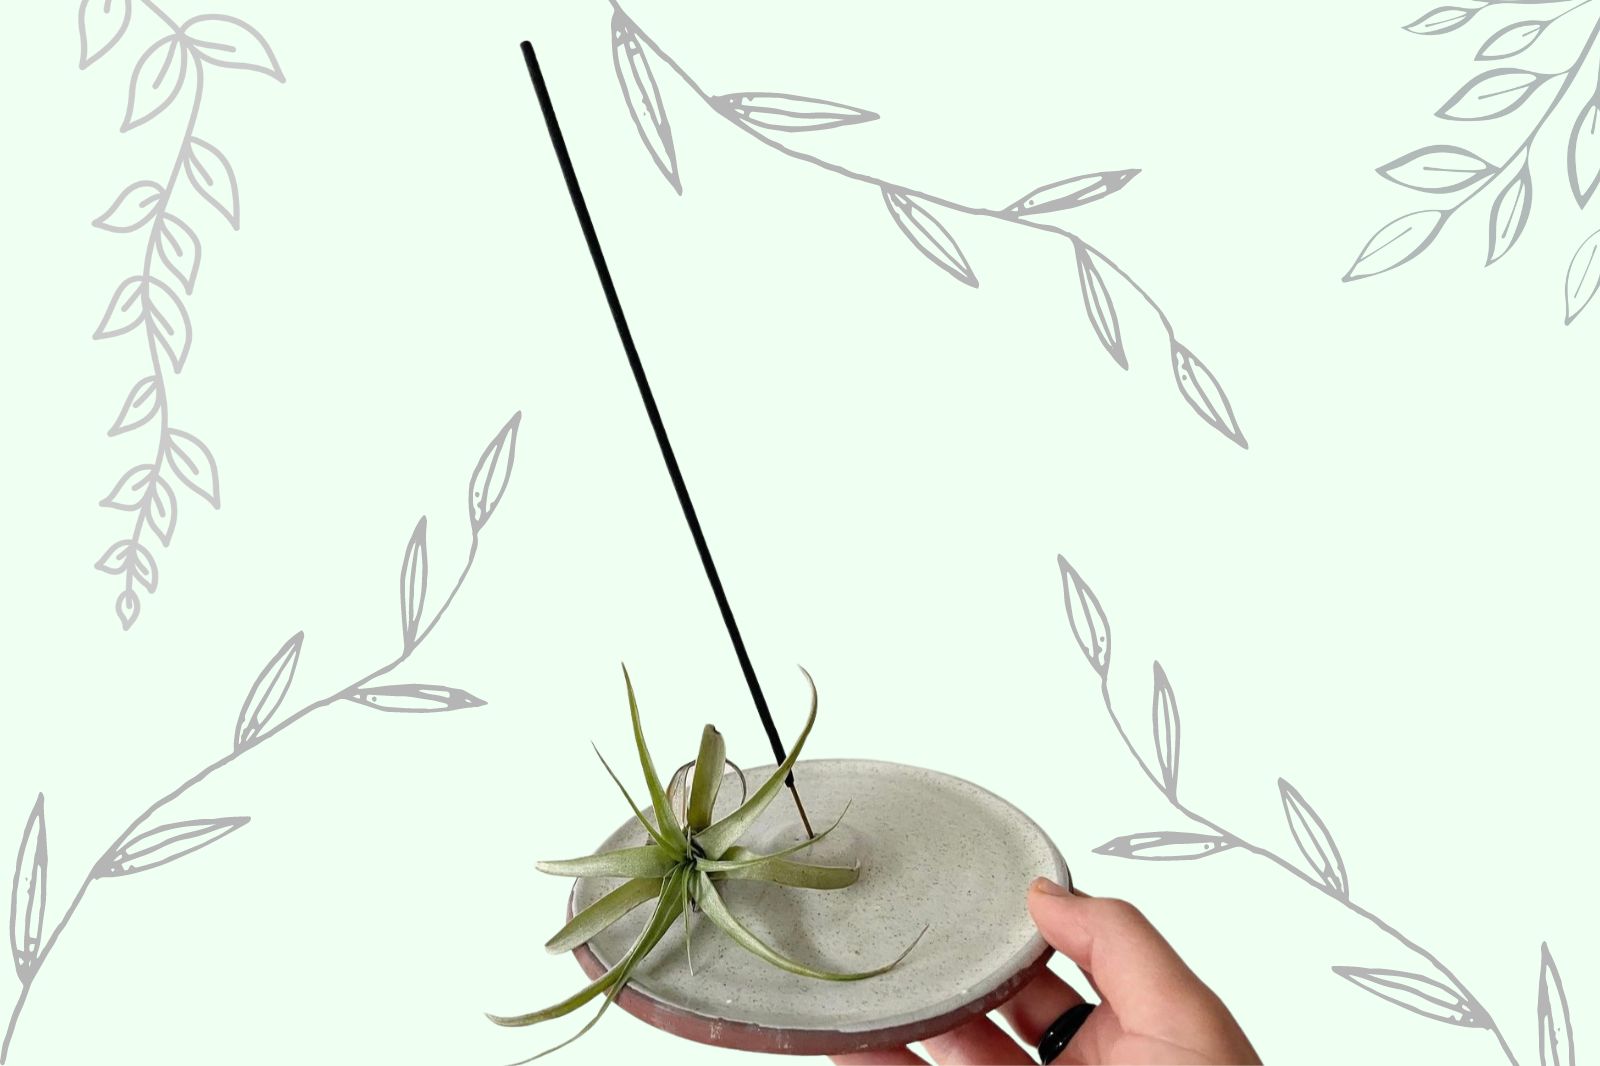
Incense Burner Plate
Materials Needed:
- Air-dry clay or oven-bake clay
- Rolling pin
- Knife or clay cutting tool
- Small bowl or round object to use as a mold (optional)
- Paint or glaze (optional)
Instructions:
- Roll Out the Clay: Begin by rolling a slab of clay to about 1/4 inch thickness using a rolling pin. This will be the base of your incense burner plate.
- Shape the Plate: Use a bowl or round object as a guide to cut out a circular shape from the clay slab. If you prefer a different shape, feel free to cut the clay into squares, ovals, or any form that suits your style.
- Create a Raised Center: To hold the incense stick, roll a small piece of clay into a cone or cylinder shape and gently attach it to the center of the plate. Ensure the base of the cone or cylinder is well-attached and smooth any seams.
- Add Holes: Use a tool or the end of a pencil to create a small hole at the top of the cone or cylinder where the incense stick will be placed. This hole should be equal to the incense sticks you use regularly.
- Decorate Your Plate: Get creative by adding texture or patterns to the surface of the plate. You can use stamps, tools, or even natural objects like leaves to make impressions.
- Dry and Finish: Allow the clay plate to dry completely according to the manufacturer’s instructions. Once dry, you can paint or glaze it to add color.
Clay Mushrooms
View this post on Instagram
Clay mushrooms are a whimsical and easy project that can be used as garden decorations or fun home accents. They are simple to make and allow for lots of creative expression.
Materials Needed:
- Air-dry clay or oven-bake clay
- Rolling pin
- Knife or clay cutting tool
- Paint or glaze (optional)
Instructions:
- Create the Mushroom Cap: Roll out a slab of clay and cut out a circle for the mushroom cap. Shape the edges to create a rounded, mushroom-like top.
- Form the Stem: Roll a piece of clay into a cylindrical shape for the stem. Attach it to the underside of the mushroom cap.
- Add Details: Use tools or your fingers to add texture and details to the mushroom cap and stem.
- Dry and Decorate: Let the clay dry completely. Once dry, you can paint or glaze your mushroom to add color and shine.
Clay Beads
View this post on Instagram
Clay beads are a versatile project that can be used to make custom jewelry, keychains, or decorations. They are straightforward to create and allow for a lot of creative freedom.
Materials Needed:
- Air-dry clay or oven-bake clay
- Rolling pin
- Bead-making tools (or household items for holes)
- Paint or glaze (optional)
Instructions:
- Prepare the Clay: Roll out a small amount of clay into a flat slab.
- Cut and Shape Beads: Use a knife or bead cutters to cut small shapes from the clay. For round beads, roll small balls of clay between your hands.
- Create Holes: Use a needle, or bead-making tool to make a hole through the center of each bead.
- Dry and Decorate: Let the beads dry completely. Once dry, you can paint or glaze them to add color and shine.
Pinch Pots
View this post on Instagram
Pinch pots are one of the simplest ceramic projects and are perfect for beginners. They are small, hand-formed bowls that can be used for a variety of purposes.
Materials Needed:
- Air-dry clay or oven-bake clay
- Water (to keep the clay moist)
- Pottery tools or fingers
Instructions:
- Form the Base: Start by rolling a small ball of clay into a rough sphere.
- Pinch and Shape: Use your thumb and fingers to pinch and press the clay into a bowl shape. Rotate the clay as you pinch to ensure an even thickness.
- Smooth the Surface: Smooth the inside and outside surfaces with your fingers or a smoothing tool.
- Dry and Finish: Allow the pinch pot to dry completely before painting or glazing, if desired.
Final Thoughts
These five projects offer a great starting point for beginners exploring the world of ceramics. Each project allows you to experiment with different techniques and tools while creating cute decorative items. As you gain confidence and skill, you can continue to explore more complex and intricate ceramic projects. It’s important to note that air-dry clay and oven-bake clay behave differently from each other. Be patient, look up ceramic resources, and continue to explore the medium!
Trusted Insights from Artists
At Art Life Today, our passion for arts and crafts is at the heart of everything we do. We understand that the right tools and materials can make all the difference in your creative projects, so we take our responsibility as reviewers seriously. Our goal is to help you discover the best products that will inspire your creativity and bring your artistic visions to life.