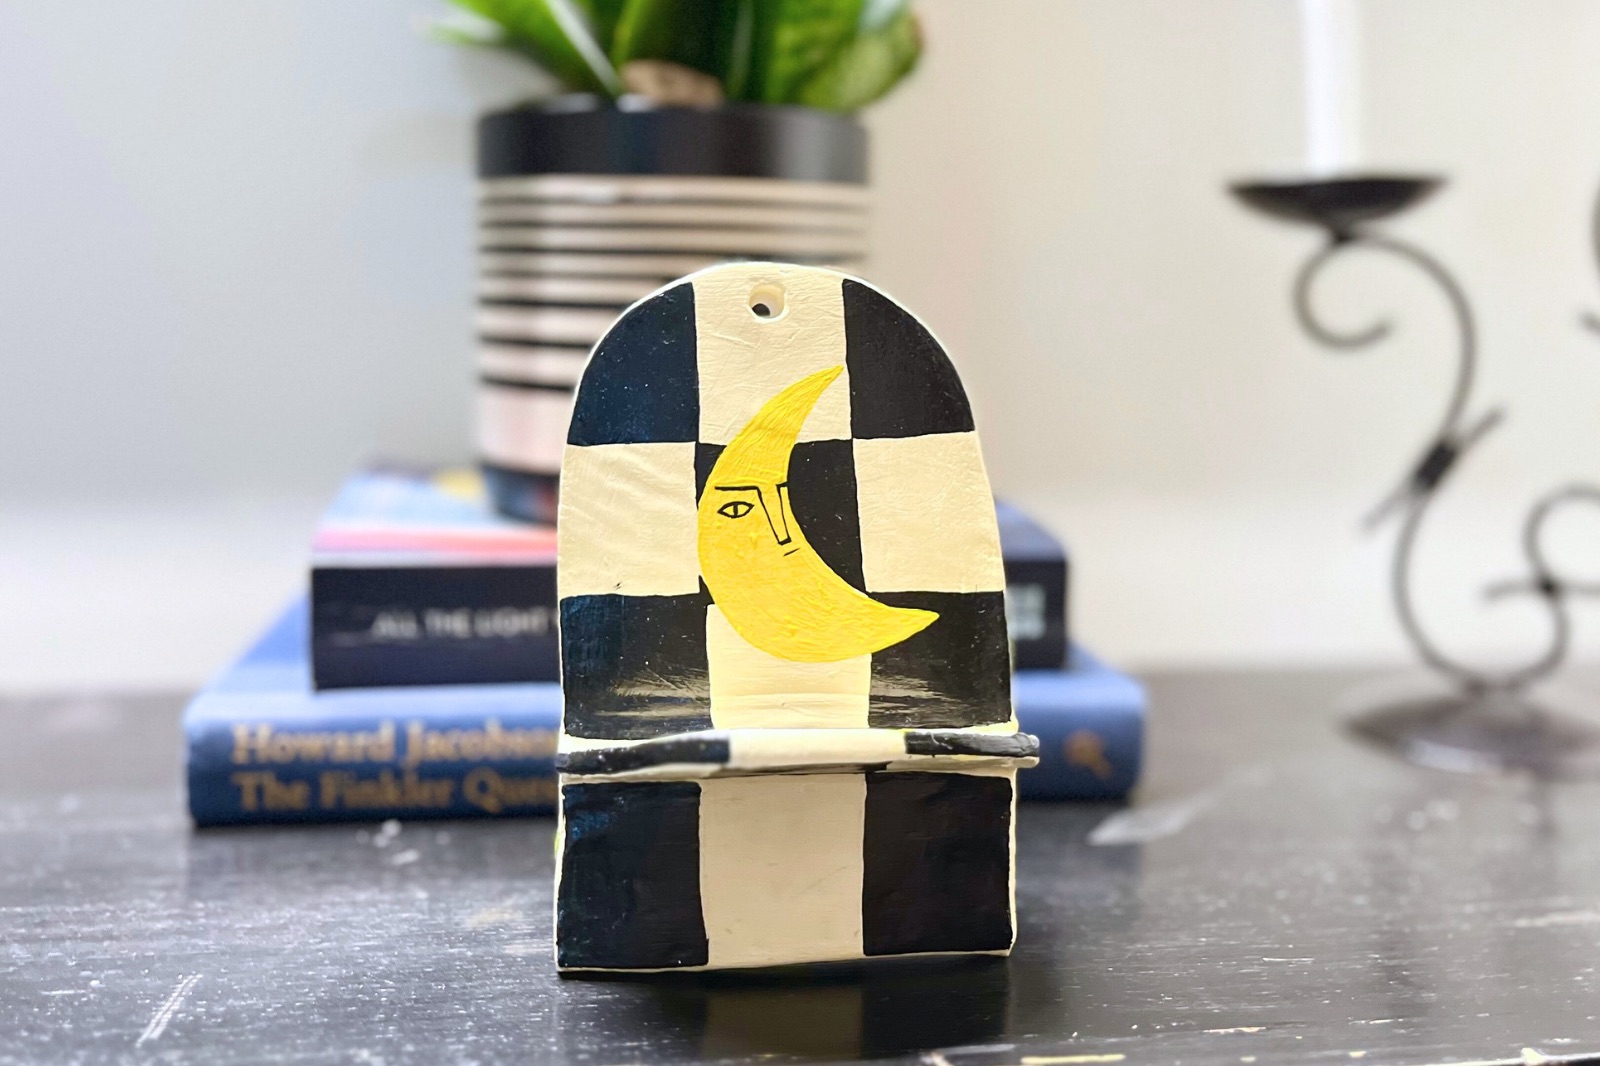
How to Make a Cute DIY Clay Wall Hanger

@aleehazai on Instagram
Creating your own clay wall hanger is a delightful and rewarding craft project that allows you to add a personal touch to your home décor. These charming pieces can serve as a little spot to hold small items like keys or simply to add a pop of color to your walls. In this blog, we’ll walk you through the steps to make a cute ceramic wall hanger.
Materials Needed
Before you start crafting, gather the following materials:
- Clay: Choose air-dry clay or oven-bake polymer clay
- Rolling Pin: For flattening the clay.
- Cutting Tools: A knife or clay cutter for shaping your piece.
- Texture Tools: Stamps, leaves, or textured rollers to create designs.
- Paint or Glaze: Acrylic paint or ceramic glaze for finishing.
- Brushes: For applying paint or glaze.
- String or Twine: To hang your wall piece.
- Drill or Needle Tool: To make holes for hanging
- Baking Sheet: To harden your piece of baked clay.
Step-by-Step Instructions
Step 1: Prepare Your Workspace
Start by setting up your workspace. Lay down a protective covering, like a plastic mat, to catch any mess. Make sure you have all your tools and materials ready and also prepare a little bowl of water if you’re using air-dry clay.
Step 2: Shape the Clay
Take a chunk of your chosen clay and knead it for a few minutes until it becomes soft and pliable. Then, use the rolling pin to flatten the clay to your desired thickness—typically about ¼ inch thick or more works well for wall hangers. Once you have a flat piece, you can cut out your desired shape. Popular options include circles, hearts, or abstract designs. Use your cutting tools to carefully shape the clay, and remove any excess. You can also add a tiny shelf to the side of your hanger or hook.
Step 3: Add Texture and Design
This is where your creativity can shine! Use stamps, leaves, or other texture tools to add unique designs to your piece. Press them into the clay gently to create patterns or impressions. If you’re feeling adventurous, you can even carve or etch designs into the surface with a needle tool.
Step 4: Create Holes for Hanging
Before your clay hardens, make holes for hanging. You can use a drill or a needle tool to create holes at the top of your piece. Make sure the holes are large enough for the string or twine you plan to use. If you’re making a larger wall hanger, consider adding more than one hole for stability.
Step 5: Dry or Bake the Clay
If you’re using air-dry clay, simply leave your piece to dry according to the manufacturer’s instructions. It usually takes around 24-48 hours. For oven-bake polymer clay, preheat your oven and place your piece on a baking sheet. Follow the instructions on the packaging. Usually baking at 275°F (135°C) for 15-30 minutes does the trick. It also depends on the thickness of your piece. Once your clay is fully dried or baked, allow it to cool completely before moving on to the next step.
Step 6: Paint or Glaze Your Piece
Now it’s time to add color! You paint on a layer of craft sealant as a primer. If you’re using acrylic paint, apply it with a brush in the colors of your choice. You can create a solid color, a gradient, or pattern. You can also add a glaze of your choosing.
Step 7: Attach the String or Twine
Once your paint or glaze is completely dry, it’s time to add the string or twine for hanging. Cut a length of string or twine and thread it through the holes you made earlier. Tie a knot to secure it, making sure it’s long enough to hang at your desired height.
Step 8: Display Your Creation
Your cute ceramic wall hanger is now ready to be displayed! Find a lovely spot on your wall to hang it, or consider grouping multiple hangers at different heights for a more dynamic display. You can use your wall hanger to hold lightweight items, such as small plants, keys, or simply let it shine as a decorative piece.
Additional Tips
- Experiment with Shapes: Don’t be afraid to experiment with different shapes and sizes. Unique designs can add character to your space.
- Use Natural Elements: Incorporate leaves, dried flowers, or even small branches into your designs for a natural touch.
- Personal Touch: Consider adding initials or meaningful symbols to personalize your wall hanger.
Conclusion
Making a cute ceramic wall hanger is a fun and creative project that not only enhances your home décor but also allows you to express your artistic side. With just a few materials and some time, you can create a beautiful piece that adds charm and functionality to your space. So gather your supplies, unleash your creativity, and enjoy the satisfying process of crafting your very own ceramic wall hanger!
Trusted Insights from Artists
At Art Life Today, our passion for arts and crafts is at the heart of everything we do. We understand that the right tools and materials can make all the difference in your creative projects, so we take our responsibility as reviewers seriously. Our goal is to help you discover the best products that will inspire your creativity and bring your artistic visions to life.