5 Trendy Tie-Dye Techniques You’ll Love This Year

Tie-dye is a craft that keeps on giving—it’s fun, creative, and each result is as unique as a fingerprint. Recently, I dove deep into the world of tie-dye and discovered some fantastic techniques that are not just easy but will give your wardrobe or home decor a fresh, vibrant twist. Whether you’re a seasoned dyer or a curious newbie, these five methods are sure to spark some inspiration.
1. Shibori
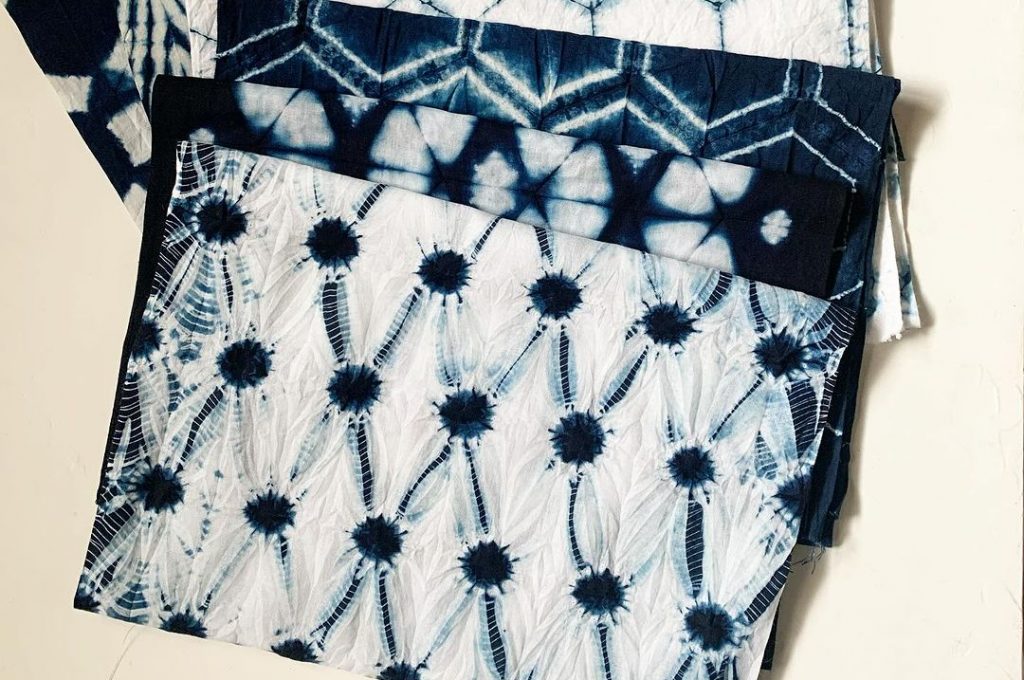
Shibori is more than just a tie-dye technique; it’s an art form with deep roots in Japanese culture, dating back to the 8th century. This method involves folding, twisting, and binding fabric, then dyeing it, usually in indigo. The beauty of Shibori lies in its versatility—there are countless ways to fold and bind the fabric, which means no two patterns are ever the same. The Itajime style, for example, uses wooden blocks to press the fabric into folds, creating beautiful, defined patterns that are stark and striking.
Materials Needed:
2. Ice Dyeing
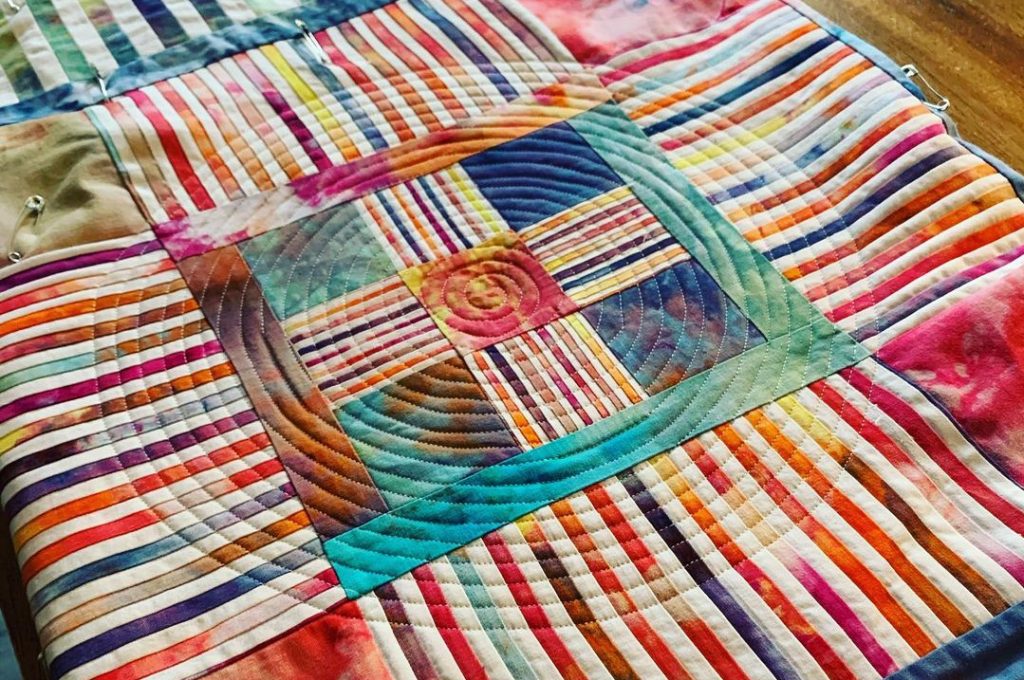
For those who love the serendipity of colors blending unpredictably, ice dyeing is a must-try. This technique involves covering your fabric with ice or snow and then sprinkling dye powder on top. As the ice melts, it carries the dye into the fabric, creating a watercolor effect that’s truly one-of-a-kind. What I adore about ice dyeing is the way the dyes split and merge, creating intricate details that you couldn’t replicate if you tried.
Materials Needed:
- White cotton t-shirt or any other natural fiber fabric
- Ice cubes or snow
- Fiber-reactive dye in assorted colors
- Rubber gloves
- A rack (to place the fabric on)
- A large container or tray (to catch the melting ice and dye)
- Plastic wrap (optional, to cover the dyeing fabric)
- Rubber bands or string (to scrunch and bind the fabric)
Steps to Create Ice-Dyed Fabric:
Step 1: Prep the Fabric
- Wash the fabric to remove any finishes that might resist the dye.
- Wet the fabric and wring out excess water. This helps the dye absorb more evenly.
Step 2: Fold and Arrange the Fabric
- Lay out the fabric on a flat surface and begin scrunching or folding it according to your preferred pattern. You can twist, pleat, or bunch the fabric to create different effects.
- Secure the fabric with rubber bands or string to maintain the pattern during the dyeing process.
Step 3: Set Up the Dyeing Station
- Place a rack over a large container or tray. The rack will hold the fabric above the container, allowing the melting ice and excess dye to drip away without pooling around the fabric.
- Position the prepared fabric on the rack.
Step 4: Cover with Ice
- Generously cover the fabric with ice cubes or snow. Make sure the entire surface is covered so that as the ice melts, it carries dye into all areas of the fabric.
Step 5: Apply the Dye
- Put on your rubber gloves to protect your hands from staining.
- Sprinkle the dye powder directly over the ice. You can use one color for a monochromatic look or multiple colors for a more vibrant effect. Place colors thoughtfully if using multiple to avoid unintentionally creating muddy colors.
Step 6: Let It Sit
- Cover the fabric with plastic wrap if you want to slow down the melting process, which can help intensify the colors.
- Allow the ice to melt completely, which can take several hours to overnight, depending on the temperature and amount of ice used. The longer the dye sits, the more vibrant the results generally are.
Step 7: Rinse and Wash
- Once the ice has melted, carefully remove the fabric from the rack and begin rinsing it in cold water to remove excess dye.
- Continue rinsing until the water runs clear.
- Wash the fabric in warm water with a mild detergent, then dry it. If possible, wash it separately the first few times to avoid dye transfer to other garments.
3. Reverse Tie-Dye

Reverse tie-dye, also known as bleach tie-dye, involves removing color from fabric using bleach instead of adding it with dye. This is perfect for giving an old dark-colored T-shirt a new life. You twist and bind the shirt as you would for traditional tie-dye, then apply a bleach solution instead of dye. The bleach lightens the fabric, and when rinsed, leaves a ghostly, intriguing pattern. This technique works best on cotton and is a fantastic way to mix up your tie-dye game.
4. Ombre Tie-Dye
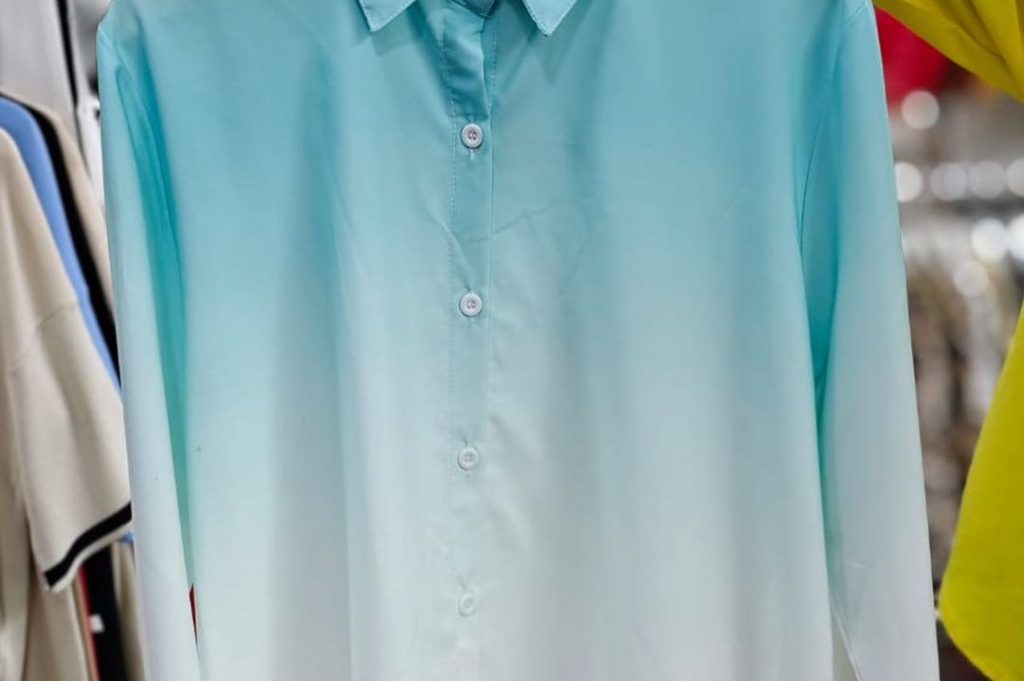
The ombre effect, where colors gradually blend into each other, is another trend that’s easy to love and achieve. Starting with a wet shirt, you apply dye at the top and use a spray bottle of water to encourage the dye to travel downwards, fading as it goes. This technique can be as subtle or as vibrant as you like, depending on the colors you choose. Blues and purples can mimic a sunset, or greys and blacks for a more monochrome, sophisticated look.
Materials Needed:
- Fabric item (such as a t-shirt)
- Fabric dye in chosen colors
- A container or bucket for dyeing
- Rubber gloves
- Plastic sheet or tarp to protect your work surface
- Small bowl with room temperature water
- Chip brush or a paintbrush
- Plastic wrap (optional, to cover the item while the dye sets)
Steps to Create Ombre Tie-Dye:
Step 1: Prepare the Fabric
- Wash your fabric item to remove any finishes that might interfere with dye absorption.
- Dampen the fabric by soaking it in water, then wring it out so it’s damp but not dripping. This helps the dye spread more smoothly.
Step 2: Lay Out the Fabric
- Spread out the fabric on a covered work surface. Try to smooth out any wrinkles, as this will help achieve a more even dye application.
Step 3: Apply the First Color
- Prepare your dye according to the manufacturer’s instructions in a container.
- Apply the dye to the top portion of your fabric. Start at one end and apply the dye heavier at the top, allowing it to naturally flow down. Use enough dye to saturate the top part but gradually lessen as you move downward.
Step 4: Blend the Dye
- Use a chip brush dipped in water to help blend the dye into the fabric. Gently brush the dye downward, softening the line where the dye ends. The water will help the dye to spread and create a gradient effect.
Step 5: Add More Colors (Optional)
- If using multiple colors, repeat the application and blending steps with your second color, starting where the first color lightens. Overlap the colors slightly to blend them together without creating a harsh line.
Step 6: Finish the Dye Application
- Continue applying dye and blending until you have covered the desired area of the fabric. If you’re aiming for a transition into white, leave the bottom part of the fabric undyed.
Step 7: Set the Dye
- Allow the dye to set on the fabric for the time recommended by the dye manufacturer, which is usually about 6-8 hours. Covering the dyed fabric with plastic wrap can help keep it moist and ensure vibrant colors.
Step 8: Rinse and Wash
- Rinse the fabric in cold water until the water runs clear, removing any excess dye.
- Wash the fabric in a washing machine on a gentle cycle with a mild detergent and cold water to remove any residual dye.
- Dry the fabric according to the care instructions, either in a dryer or by air drying.
5. Sunburst Pattern
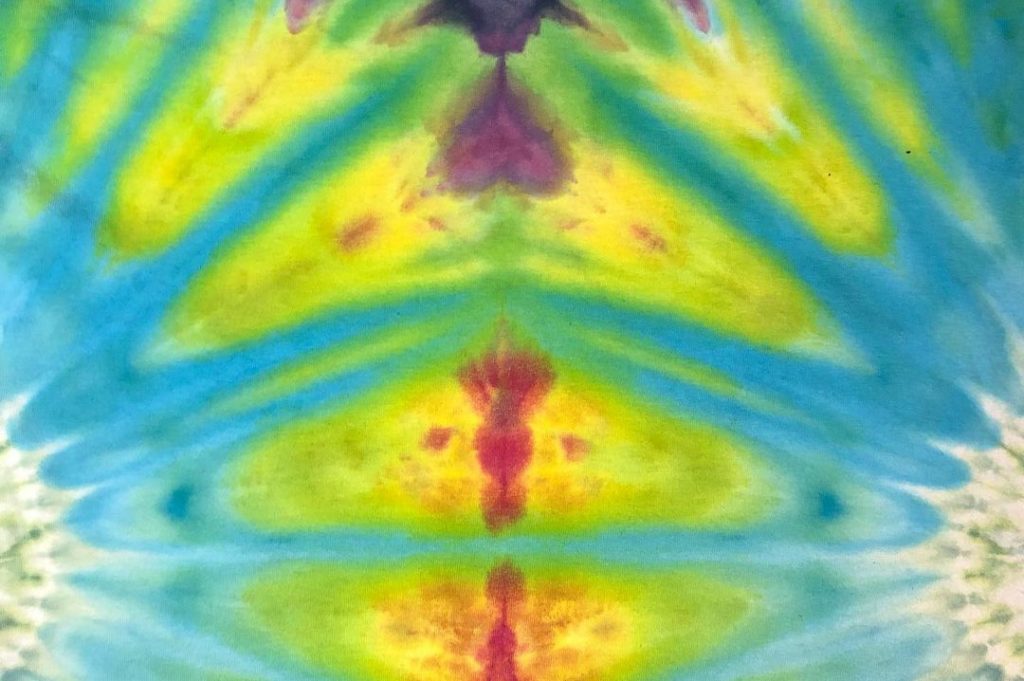
Sunburst brings a cheerful vibe to any piece of fabric. You start by pinching small sections of the shirt and using rubber bands to create peaks, which will form the ‘rays’ of your sunbursts. Dye is then applied directly to these banded peaks, and the rest of the fabric can be dyed in a contrasting color or left white to make the sunbursts pop. This method is fantastic for personalized designs and can be adapted to create not just sunbursts but flowers, stars, or even fireworks.
Trusted Insights from Artists
At Art Life Today, our passion for arts and crafts is at the heart of everything we do. We understand that the right tools and materials can make all the difference in your creative projects, so we take our responsibility as reviewers seriously. Our goal is to help you discover the best products that will inspire your creativity and bring your artistic visions to life.