How To Make a Geometric Origami Vase With Just Paper

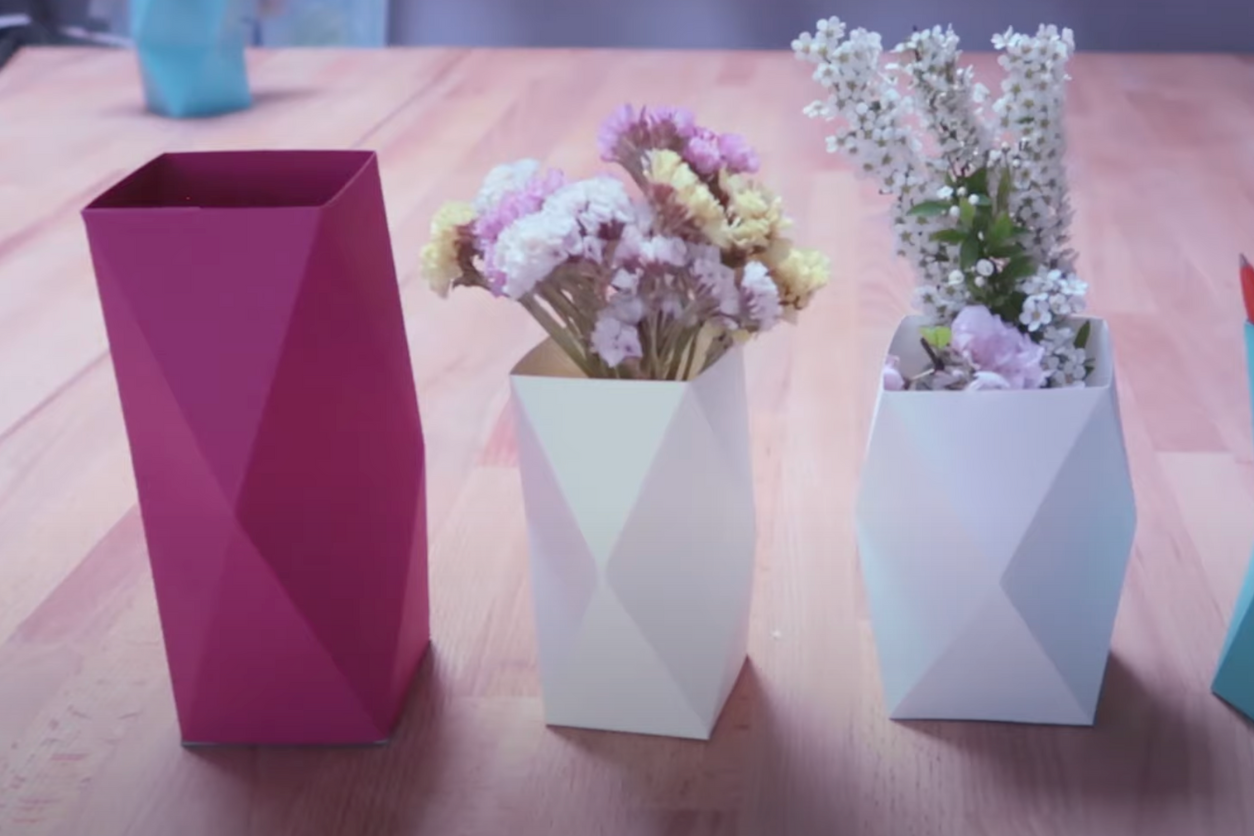
Making your own geometric origami vase is one of those DIY projects that’s not only satisfying to make but also adds a unique touch of decor to your space. These paper crafts are versatile and stylish; you can use them as a stationary holder or a chic vase with a hidden jar of water for flowers. Here’s a step-by-step guide for making the vase.
Choosing Your Paper
First things first, let’s talk about the paper. For my vases, I opted for pastel paper with a density of 160 grams per square meter because I love the soft colors and it holds up well for folding. However, you’re not limited to just this type; even simple school cardboard works if that’s what you have on hand. The key here is to use something that’s sturdy enough to maintain its shape but still easy to fold.
Cutting and Marking
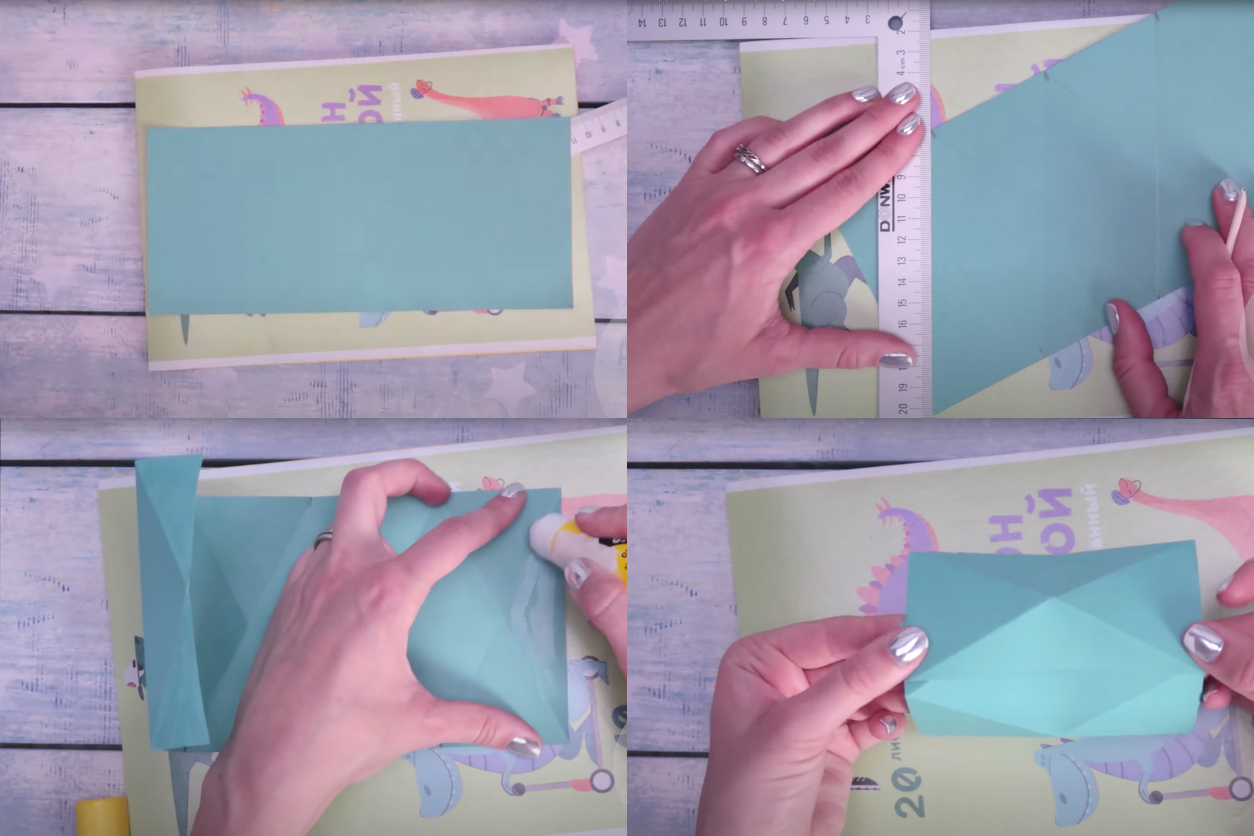
Start by cutting out a rectangle from your selected paper, measuring 27 x 12 cm. Remember, the 12 cm will be the height of your vase, but feel free to adjust this according to where you plan to place it or the look you’re going for. You can make it taller or shorter by varying the length of this rectangle.
Once you have your rectangle, it’s time to make some marks to create the folds for the geometric pattern. Divide the long side of the rectangle into four sections, each 6 cm, leaving a 3 cm piece at the end. Do this symmetrically on both long sides of the rectangle.

Now, without drawing solid lines, connect these points diagonally to create impressions on the paper. I like to use a wooden stick for this because it doesn’t damage the paper but leaves a clear enough impression to follow. You could also use a spent ball pen refill or any other blunt tool that won’t cut through the paper.
Creating the Geometric Pattern
With your diagonal lines marked, it’s time to add another layer of complexity to the geometric pattern. Go ahead and repeat the process in the other direction to form diamond shapes across the paper. This part is a bit like a puzzle, seeing how the lines intersect and create a beautiful pattern.
Once you’ve outlined all the diamond shapes, identify the crossing points of these lines. Use these as guides to find the center of each side and complete the last diamond. This should leave you with a visually appealing, symmetrical pattern on your paper.
Folding and Assembling
Now, following the lines you’ve impressed onto the paper, start folding along them. The paper will almost intuitively follow your folds if you’ve made the impressions clear. Fold one direction first, and then the other, making sure to reinforce the creases so they are crisp and hold their shape well.
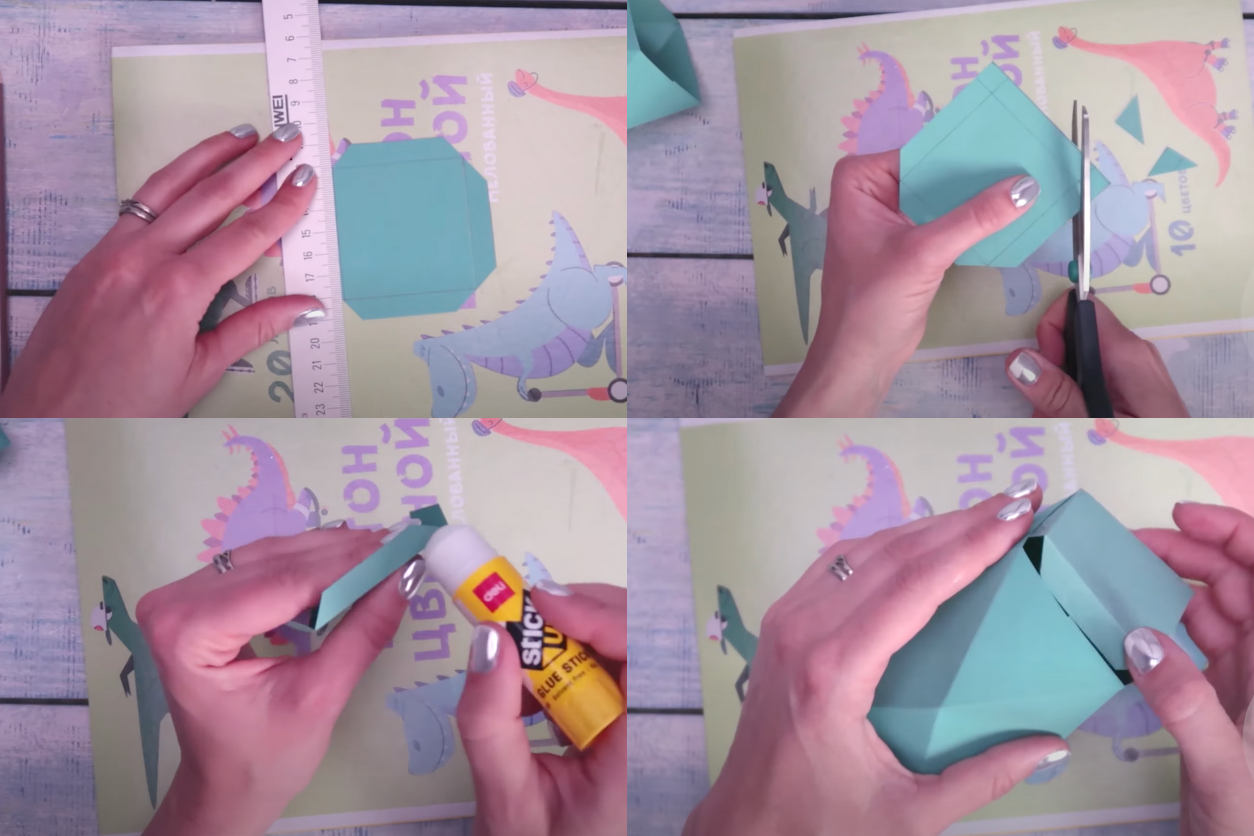
Once all the creases are in place, bring the edges of the paper together to form the vase’s shape. The seam where the edges meet should be almost invisible if you align everything neatly. Apply a little glue stick on the inside to secure the seam, especially focusing on two small triangles you’ll find at the seam and a larger one inside for extra hold.
Crafting the Bottom

For the bottom of the vase, cut out an 8 cm square, and inside this square, step back 1 cm from each edge to draw another, smaller 6 cm square. This creates a frame-like effect. Cut off the outer corners—we won’t be needing those—and go over the inner square’s lines with your wooden stick to make them easier to fold.
Erase any visible pencil marks, then fold up the “ears” created by the inner square. These flaps are what you’ll glue to the inside of the vase to form a solid base. Apply a generous amount of glue on these ears and carefully insert the bottom into the vase. I like to reach inside with my left hand and press the ears firmly against the vase’s walls to ensure they stick well both from the inside and outside.

And voilà! Your very own paper vase is ready! Feel free to experiment with different sizes and colors. These vases can truly make your space pop, and because they’re so lightweight, you can place them almost anywhere.
Trusted Insights from Artists
At Art Life Today, our passion for arts and crafts is at the heart of everything we do. We understand that the right tools and materials can make all the difference in your creative projects, so we take our responsibility as reviewers seriously. Our goal is to help you discover the best products that will inspire your creativity and bring your artistic visions to life.