How To Make a Paper Boat That Floats
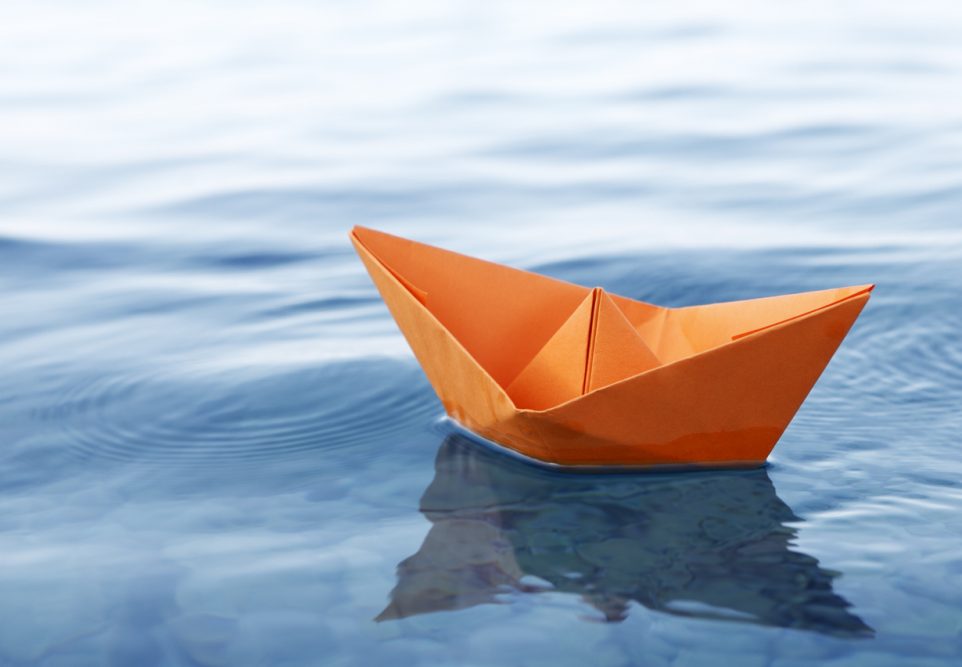
Ever wanted to make a paper boat that not only looks great but also floats beautifully on water? Whether it’s for a fun craft project with kids or just a nostalgic trip down memory lane, making a paper boat is simpler than it sounds, and it’s definitely a rewarding little project. Here’s a step-by-step guide on how to make one that’s both sturdy and buoyant.
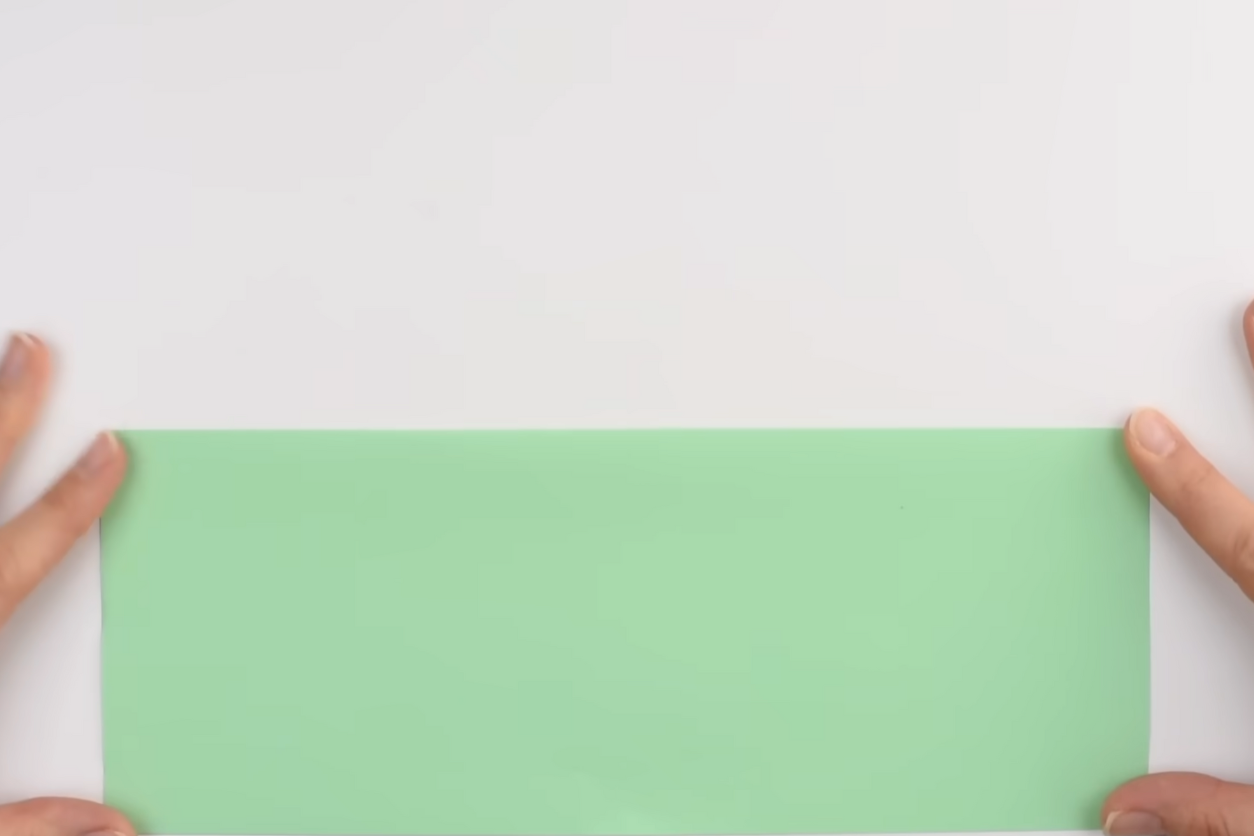
Step 1: Choose Your Paper
First things first, grab a rectangle sheet of paper. The size doesn’t matter too much; just use whatever you have on hand, but a standard A4 or letter size works well for a first attempt.
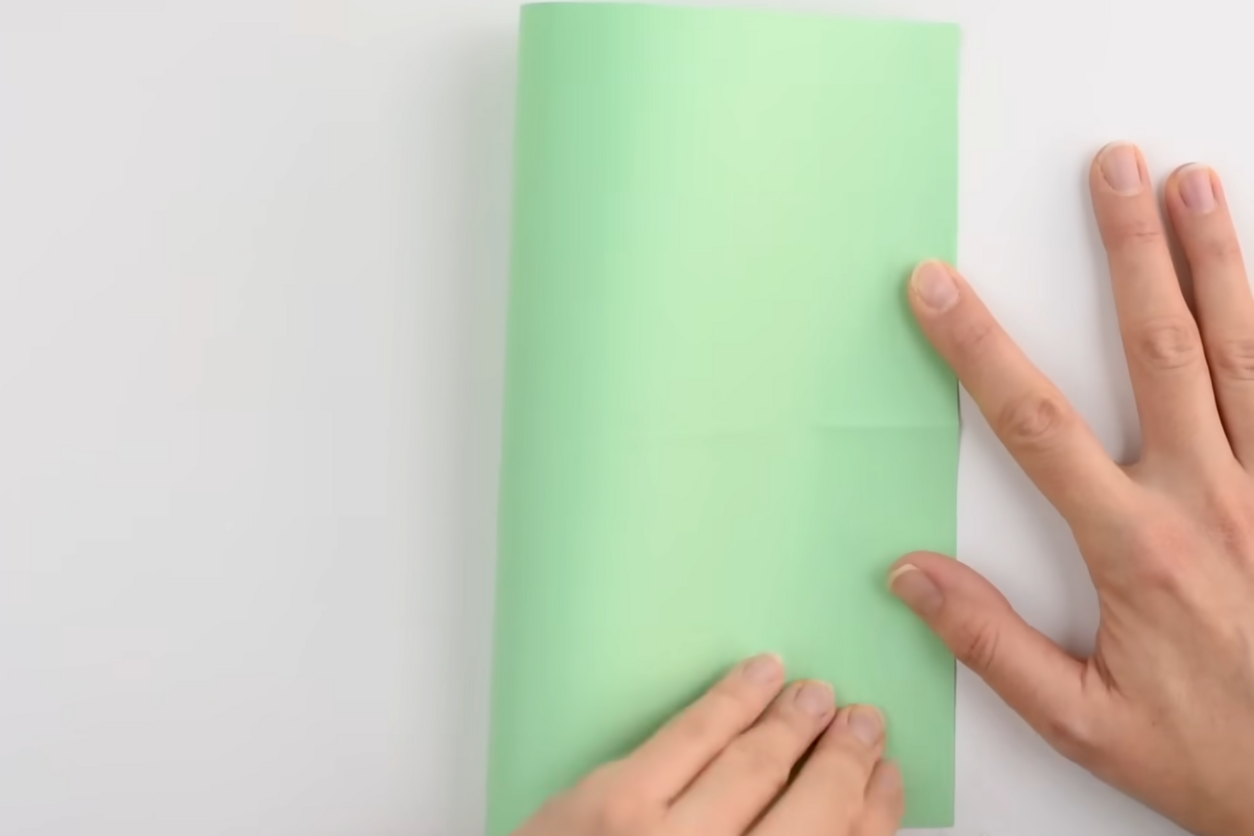
Step 2: Fold in Half
Take your rectangular sheet and fold it in half along the shorter side. Crease it well and then open it back up. This initial fold is just to create a crease guide for later steps.
Step 3: Fold Again
Now, fold the paper in half from bottom to top along its long side. After this, flip the paper so that the fold opens toward you. This helps set the stage for the next part of the folding process.
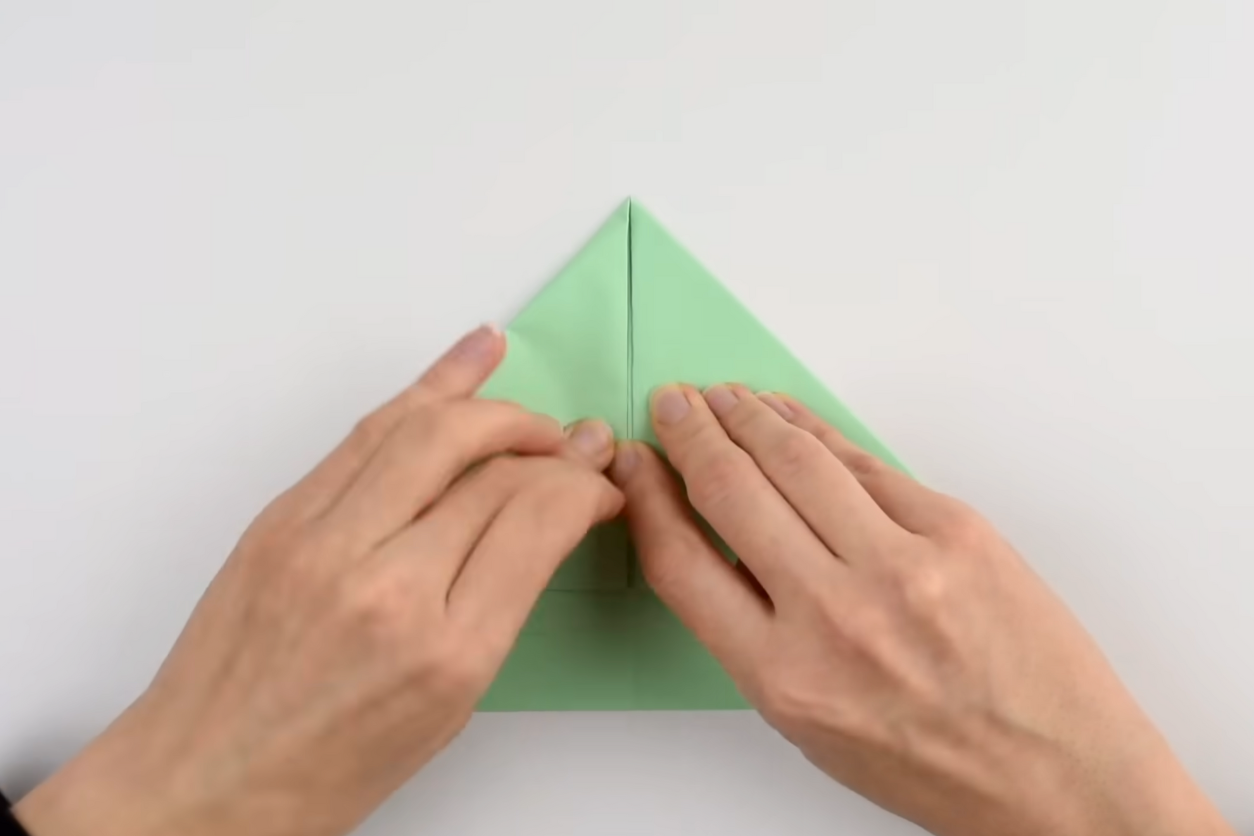
Step 4: Create the Point
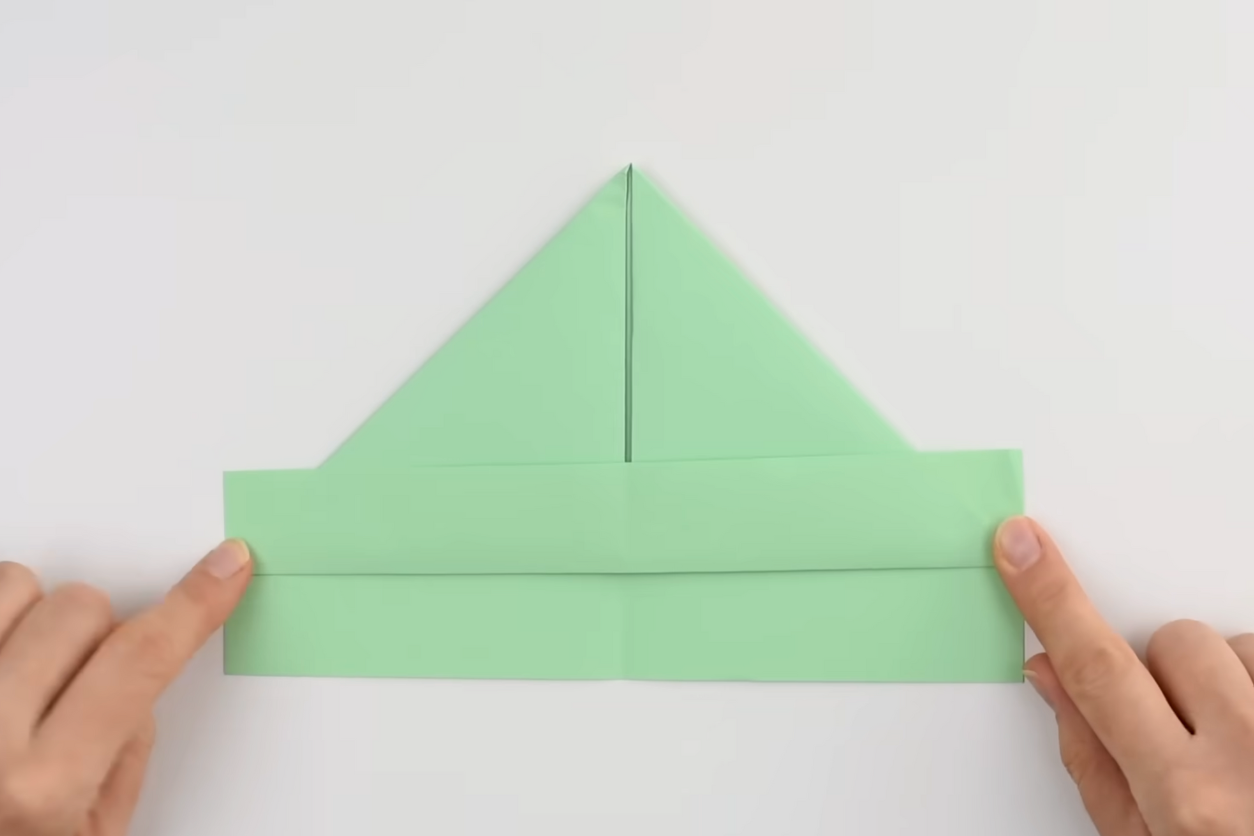
Here’s where it starts to take shape. Fold down the top corners of the paper to the center crease, leaving about an inch of space at the bottom. This forms a triangular shape at the top with a rectangular strip sitting at the bottom.
Step 5: Fold the Bottom Up
Next, fold the bottom strip of the paper upwards on both sides. This helps lock the corners you just folded down and adds a bit of stability to the structure.
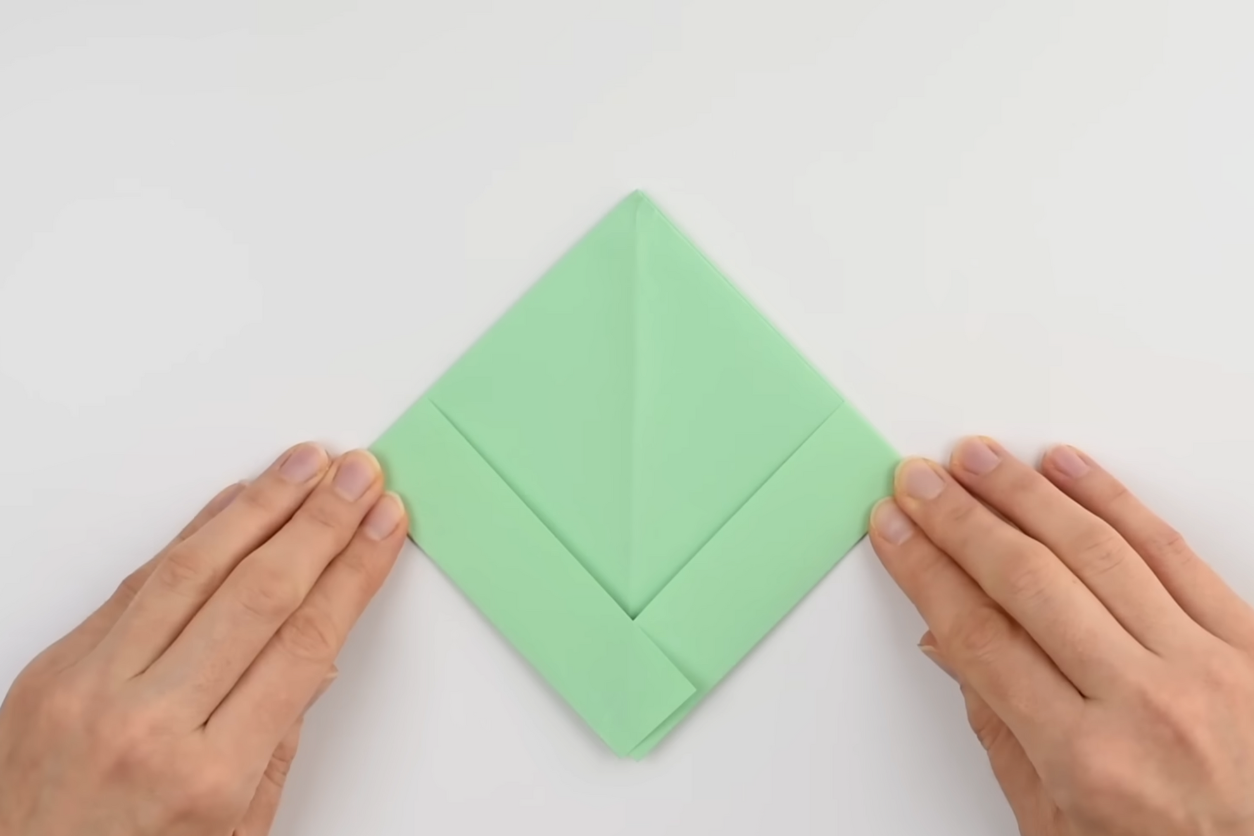
Step 6: Shape the Bottom
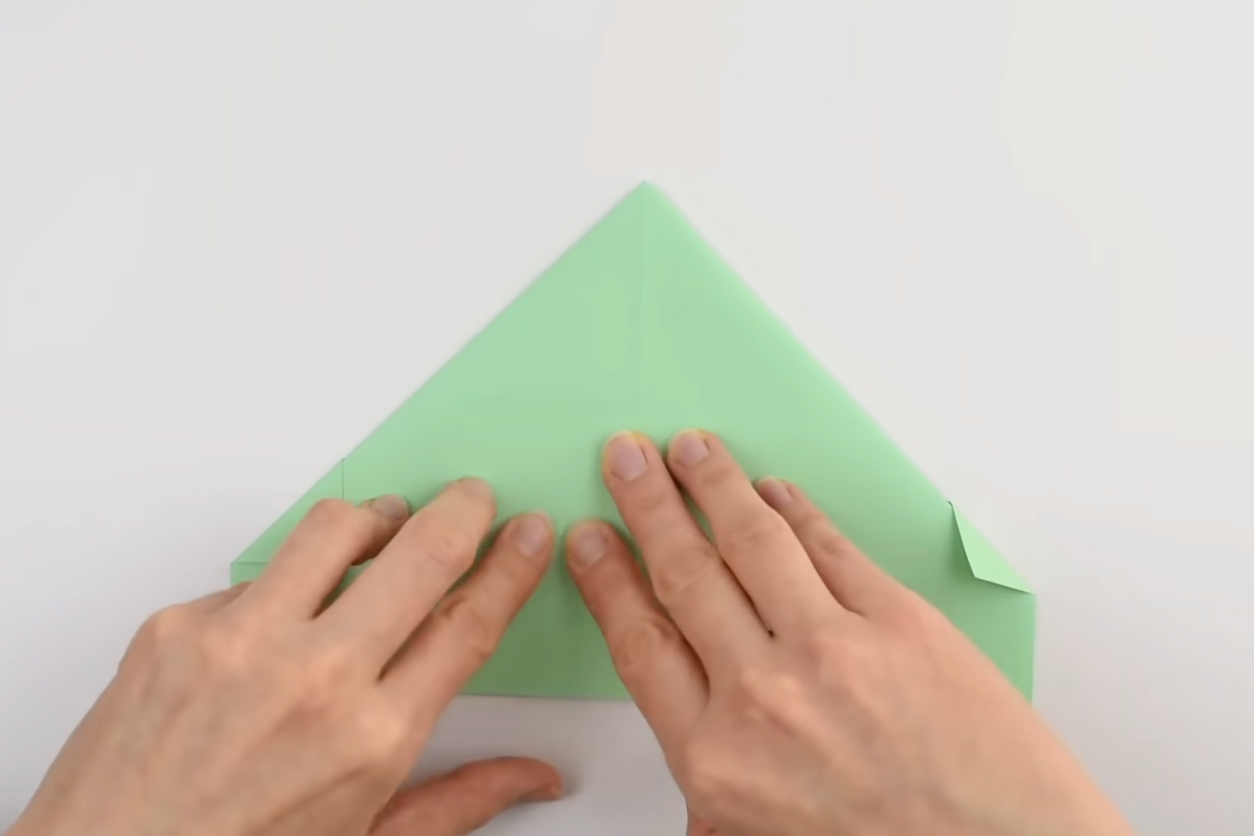
Fold the outer bottom corners into the center line. This step sharpens the lower part of your boat’s structure and prepares it for the final shaping.
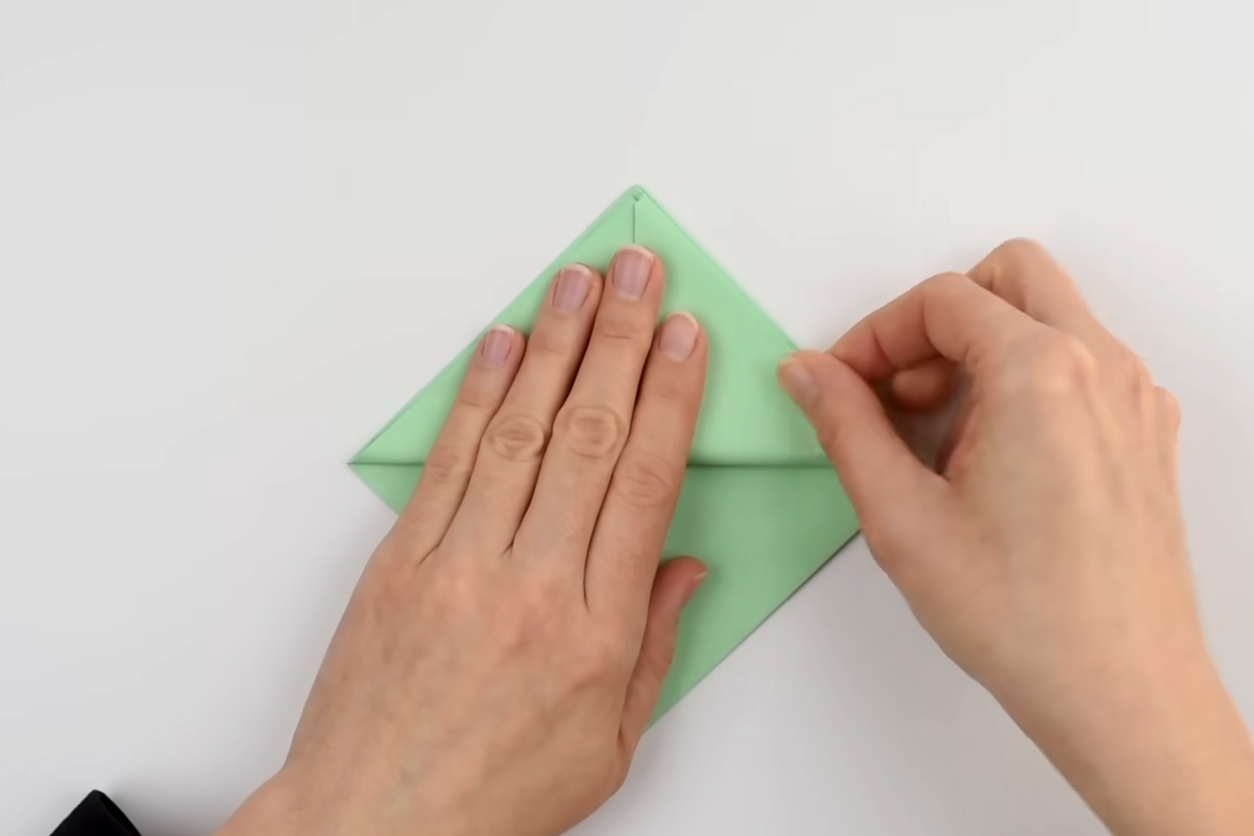
Step 7: Form the Square
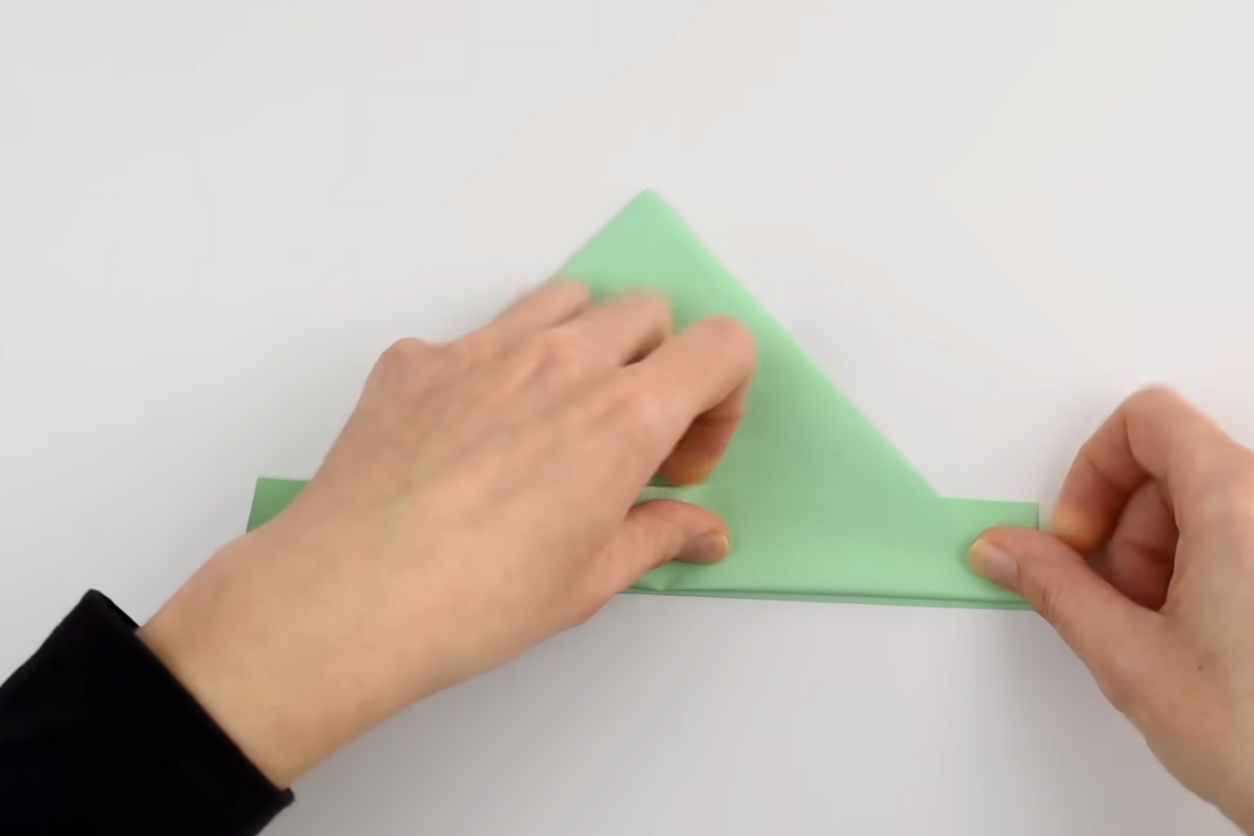
Pick up the paper so you’re looking at the triangle. Gently pull apart the layers at the bottom of the triangle, allowing it to pop open and flatten into a square. This is a bit like opening a paper bag.
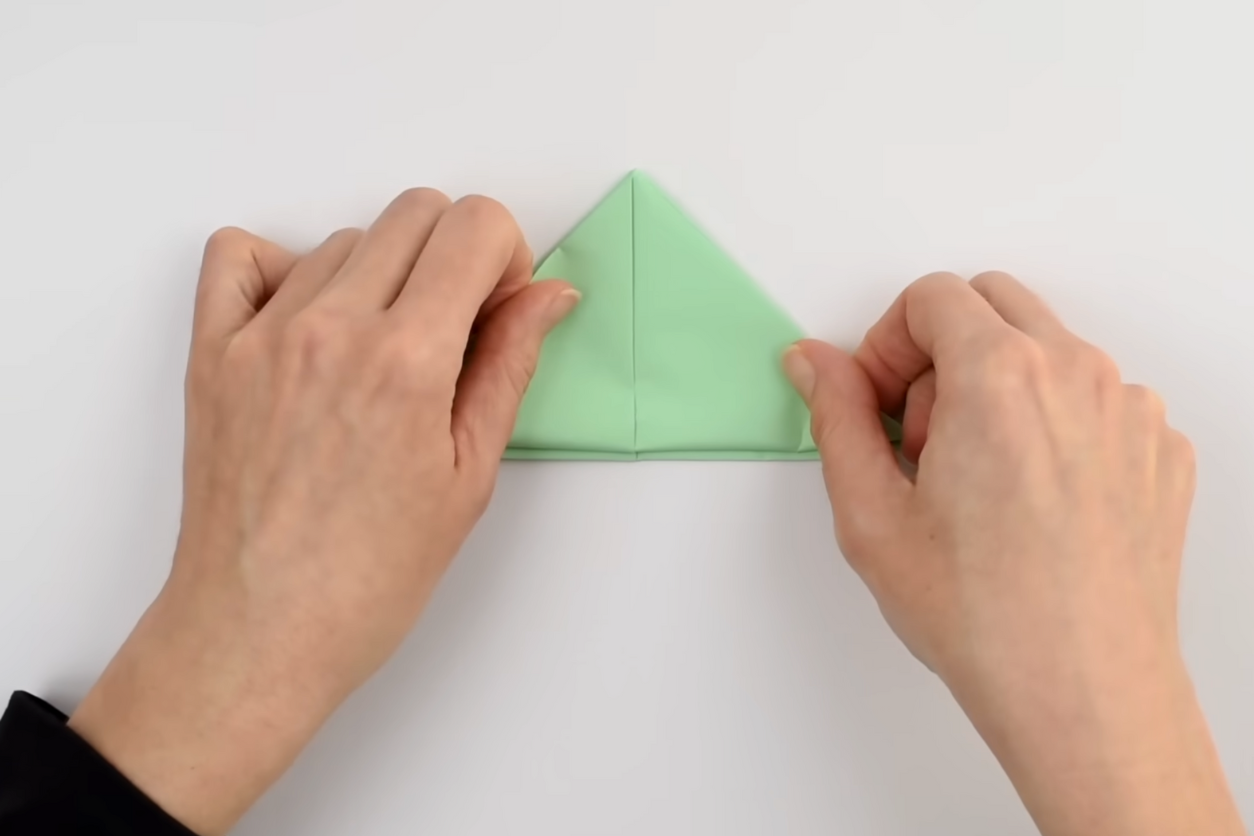
Step 8: Build the Hull
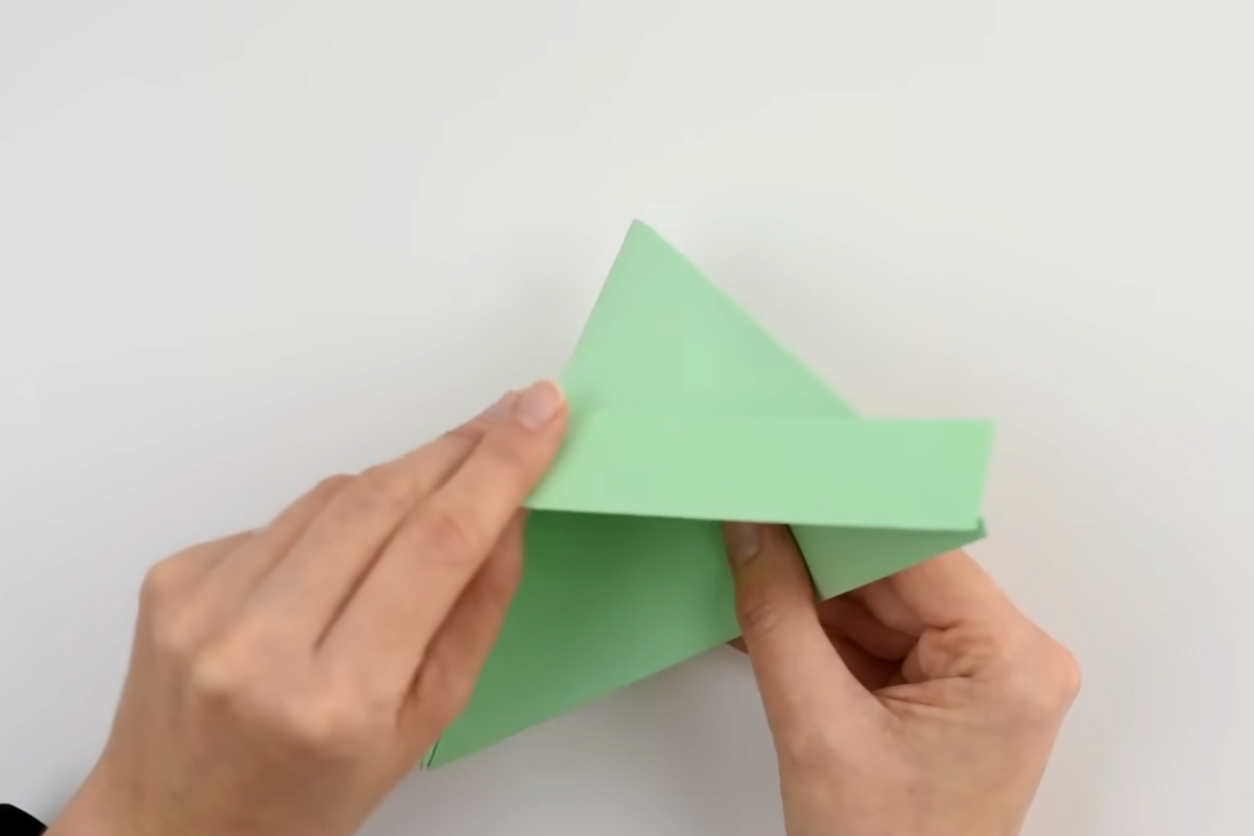
Keeping the single-layered part of the square facing down, take the bottom point of the upper layer and fold it up to the top point. Flip the entire thing over and repeat this step on the other side. This starts to form the hull of your boat.
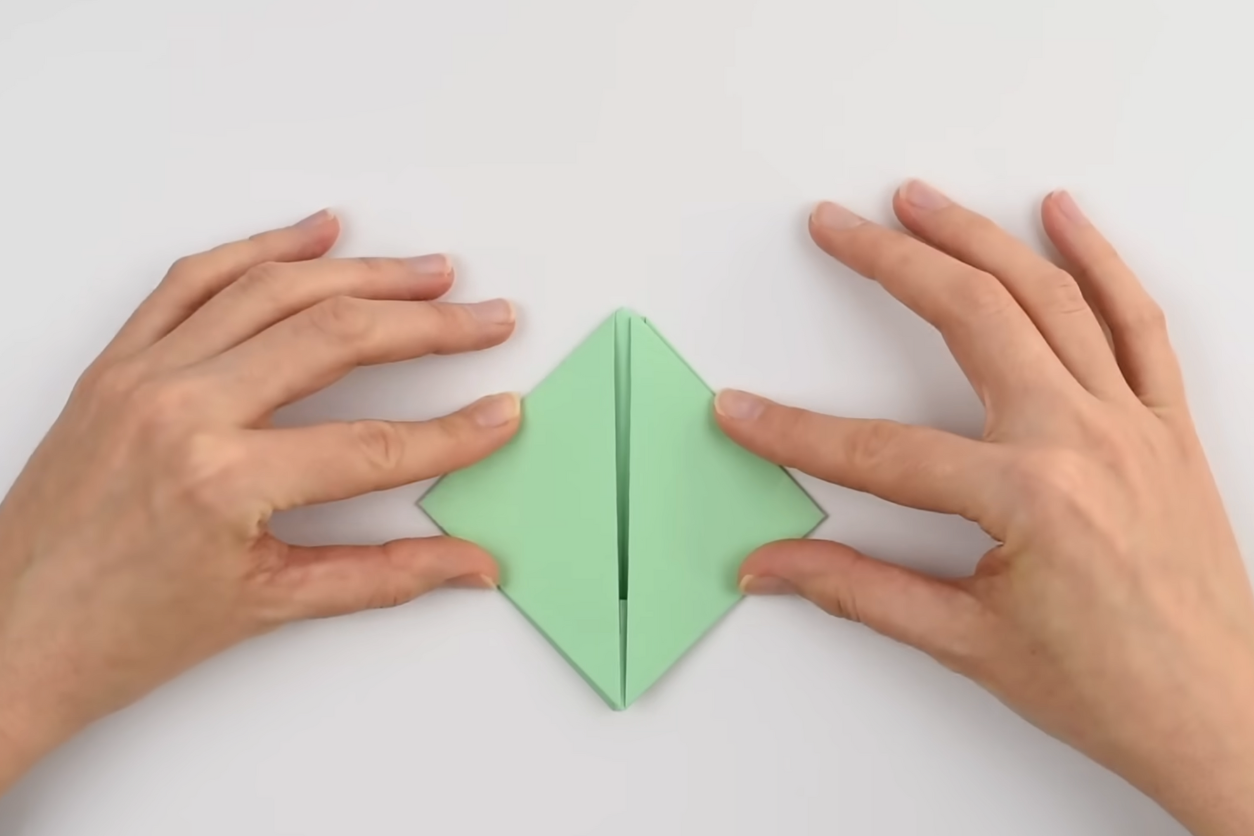
Step 9: Final Folds
Again, open up the model by pulling apart the layers at the bottom. It will naturally begin to form a new square. This reinforces the base of your boat, making it more durable in water.
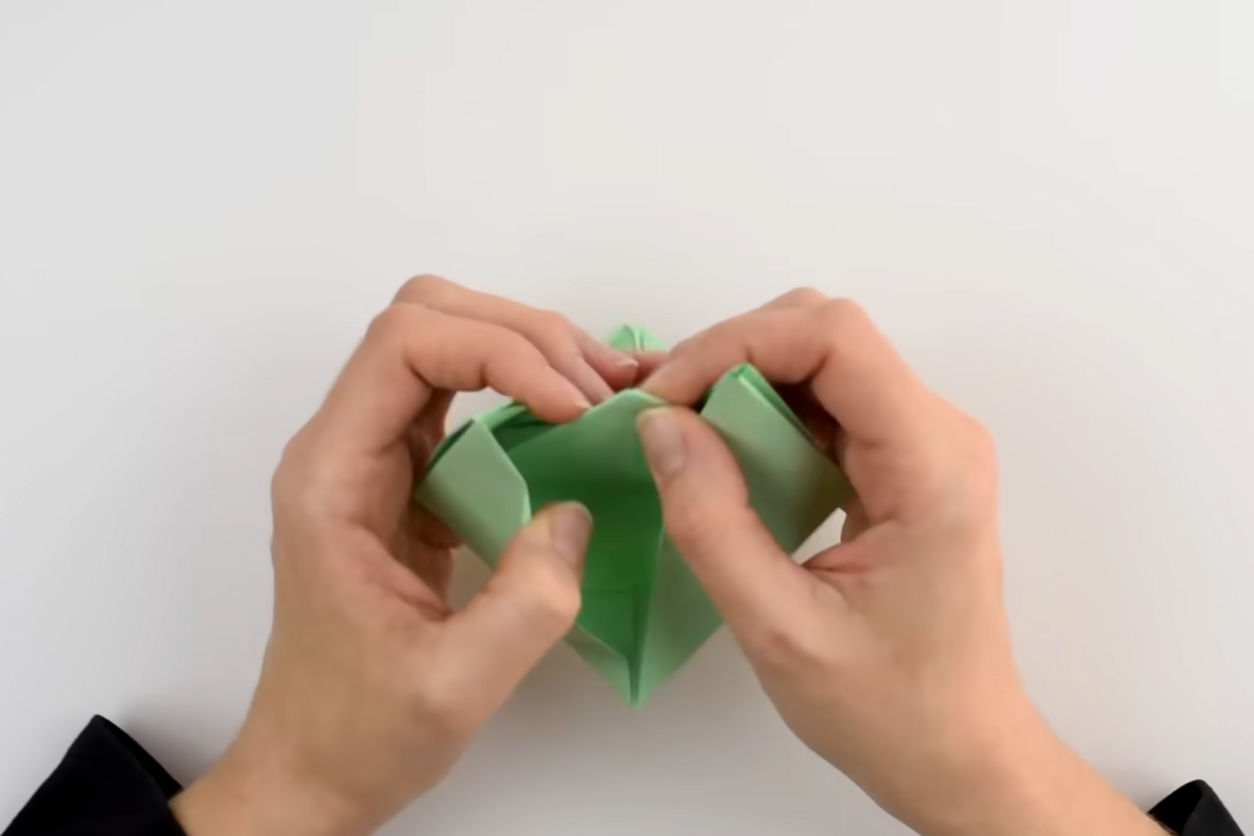
The Grand Unveiling
For the final step, find the two points at the top of your latest square that are sticking out slightly—these are part of the hidden triangles. Gently pull these points outwards and apart. As you do this, the boat will start to open up and take its final form.
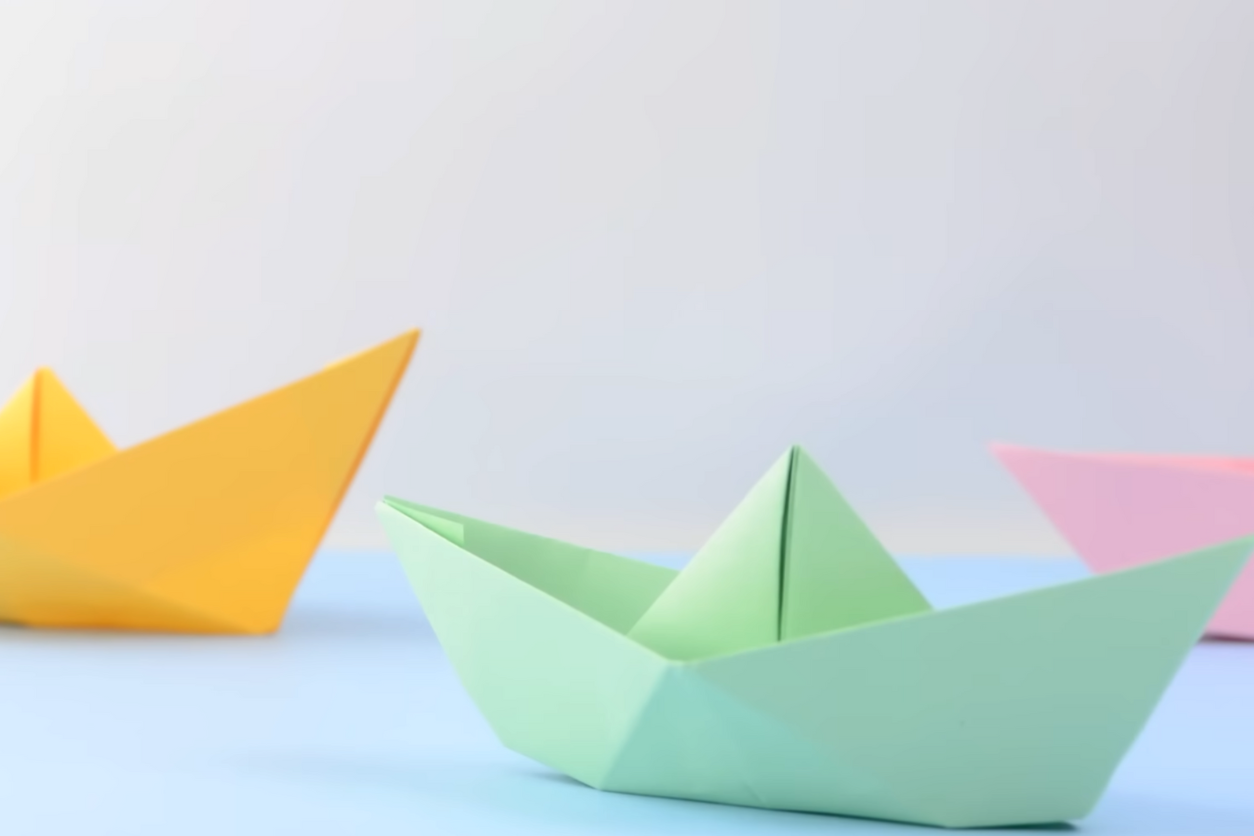
Congratulations, you’ve just made a paper boat! It’s ready for its maiden voyage across your nearest puddle, bathtub, or pond. These boats can float quite well, especially if you’ve made your folds crisp and clean. Just remember, they’re still made of paper, so their time afloat might be limited based on the type of paper used and the conditions in the water.
Trusted Insights from Artists
At Art Life Today, our passion for arts and crafts is at the heart of everything we do. We understand that the right tools and materials can make all the difference in your creative projects, so we take our responsibility as reviewers seriously. Our goal is to help you discover the best products that will inspire your creativity and bring your artistic visions to life.