How to Make a Cute Daisy Chain Bead Bracelet
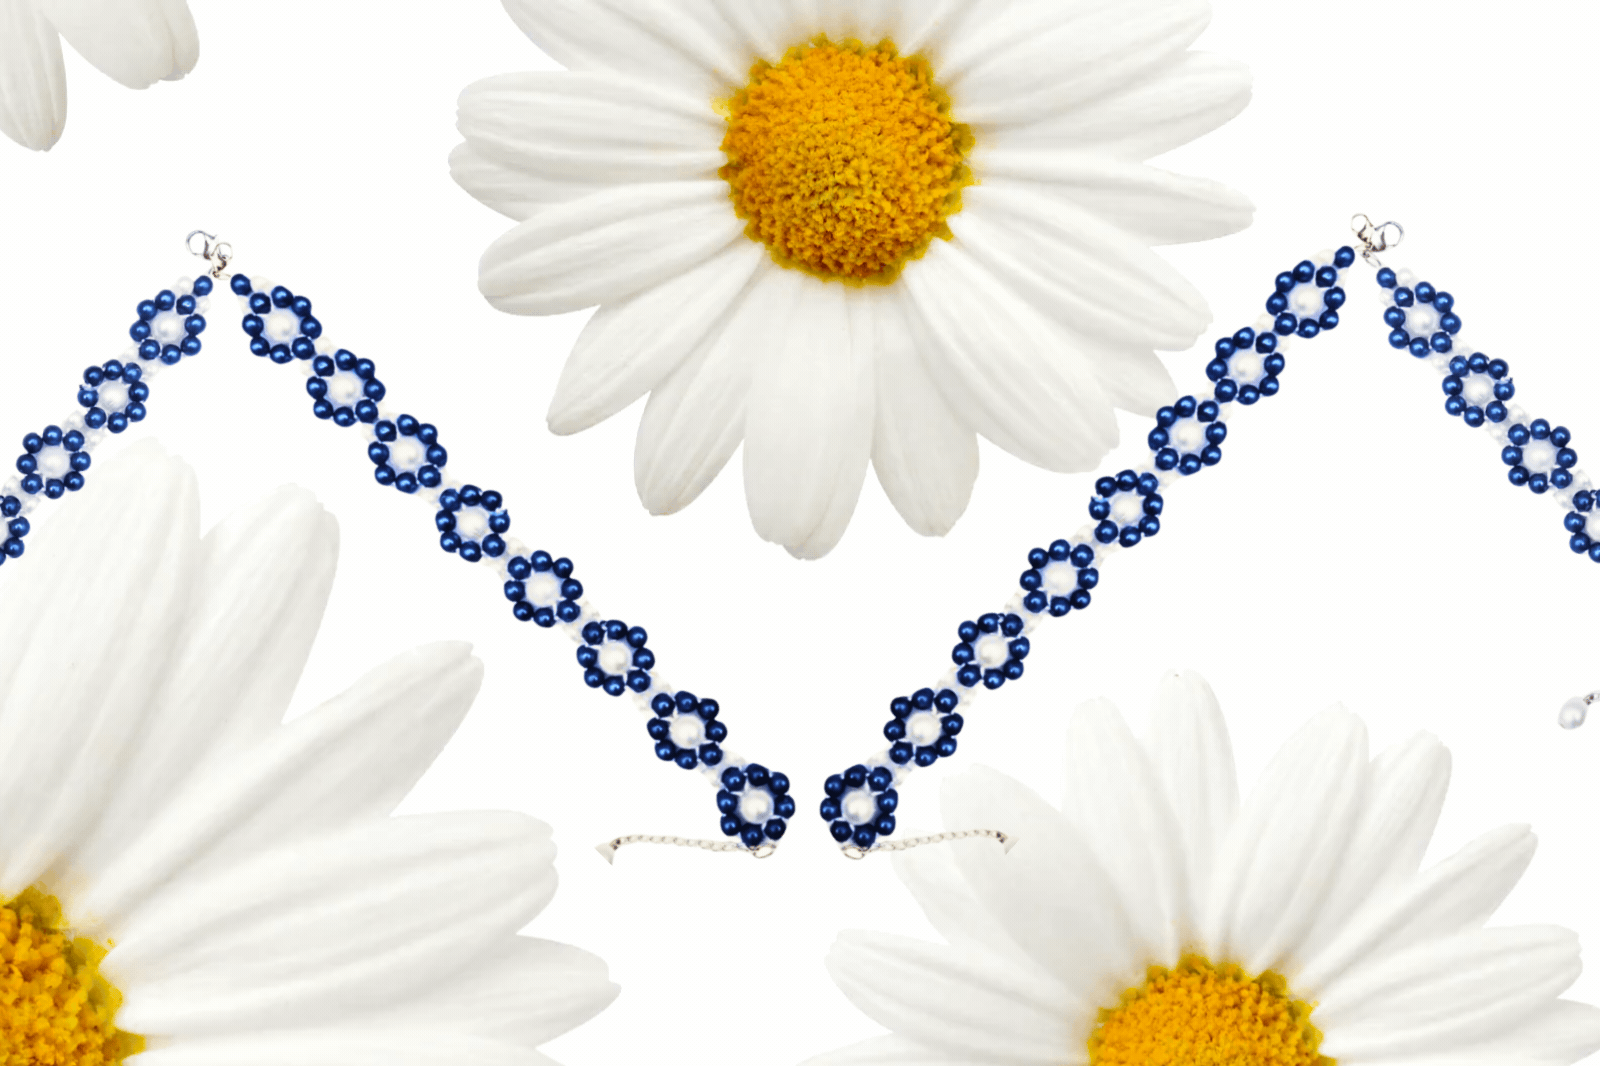
Creating a daisy chain bead bracelet is a great way to add personalized pieces to your jewelry collection. This charming accessory is perfect for adding a pop of color to a cute outfit or as a gift to someone special. Whether you’re a seasoned jewelry maker or a beginner looking to try something new, this step-by-step guide will help you create a cute daisy chain bead bracelet that you can proudly say “I made it!” when someone asks about it.
What You’ll Need
Before diving into the crafting process, gather the following materials:
- Beads: Choose a variety of colors and sizes. For a daisy chain bracelet, you’ll need smaller round beads for the petals and a slightly larger bead for the center of each flower. Seed beads work well for petals, while round or gemstone beads can serve as the center.
- Beading Wire or Stretch Cord: Use beading wire for a more structured bracelet or stretch cord if you prefer an elastic fit.
- Crimp Beads and Crimping Tool (if using beading wire): These are used to secure the ends of the wire.
- Bead Threading Needle: To help thread beads onto the wire/cord.
- Scissors: For cutting the cord or wire.
- Clasp (if using beading wire): A clasp is optional if you are using stretch cord, but necessary for a beaded wire bracelet.
- Bead Stoppers or Tape: To prevent beads from falling off while working.
Step-by-Step Instructions
Cut Your Beading Wire or Stretch Cord
Measure and cut a length of beading wire or stretch cord. A good idea is to cut a large length of cord so you can just snip off any extra versus facing the problem of running out of room to work. For a bracelet, you’ll need approximately 7- 8 inches when you’re finished, depending on your wrist size. Add a little extra length to account for adjustments and the clasp.
Create the First Daisy
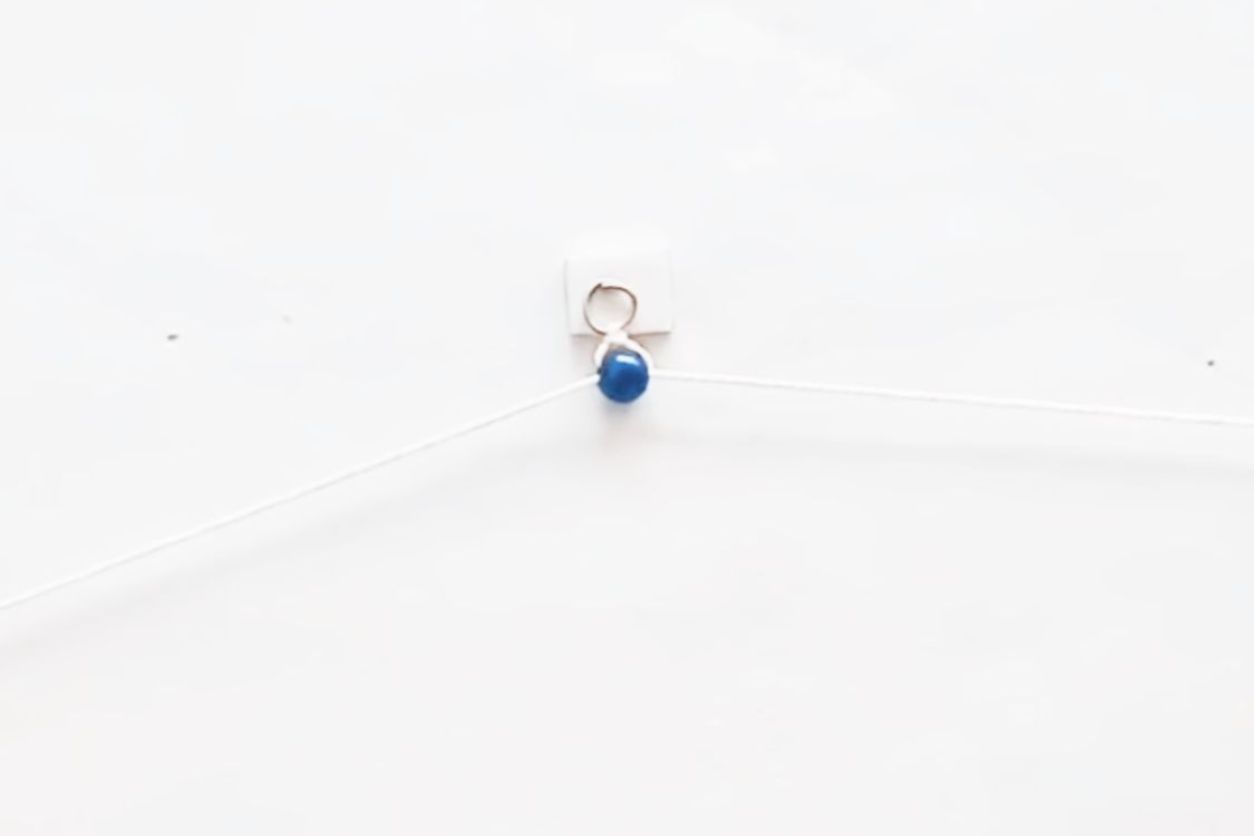
Take a long length of cord, find the middle, and attach one end of a clasp. Knot it tight. Then wire a central, petal bead and knot it down, pull each cord tight again.
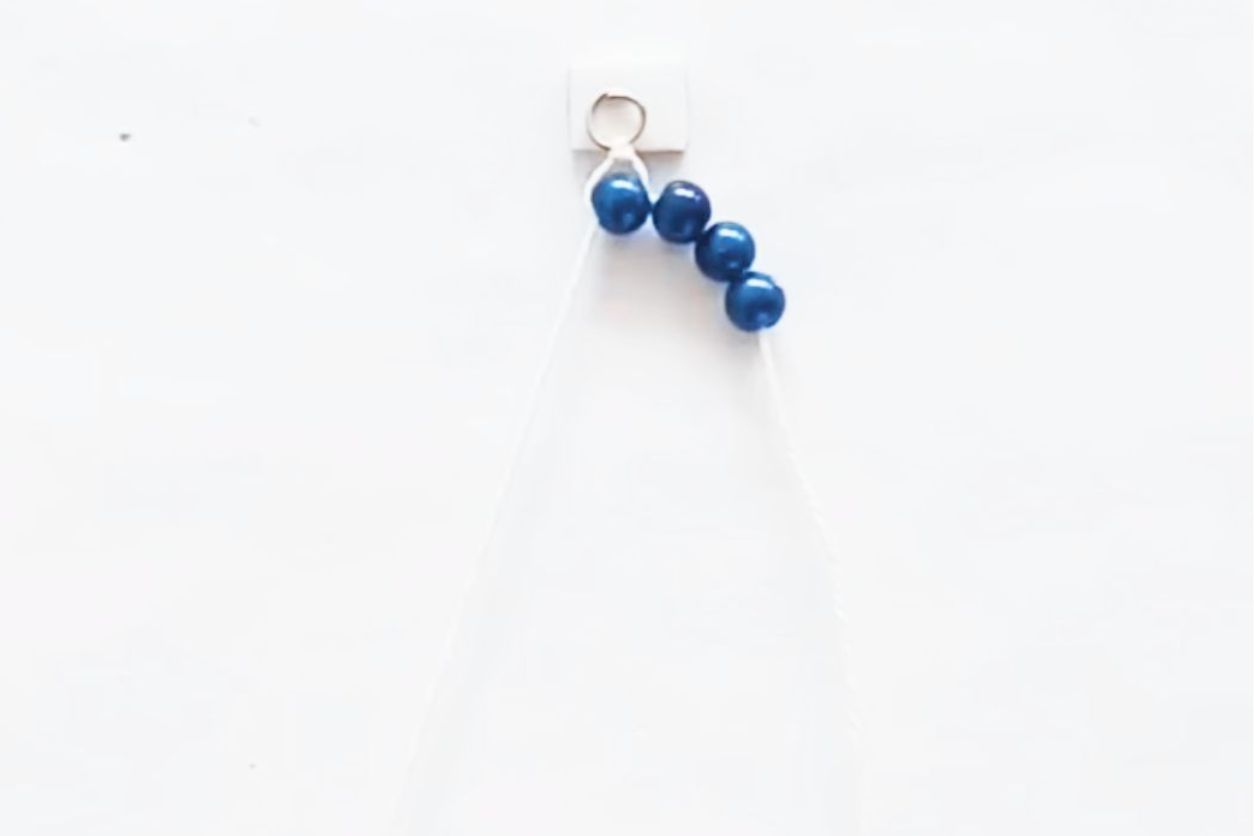
Add three petal beads to each cord on both sides, then slide on a central bead to both cord ends. To create a daisy effect, ensure the petal beads are pretty tight and sit close to the center bead. Then pull the center bead up.

Using the help of a beading needle, sew each cord end through the three petal beads on both sides. Pull tight.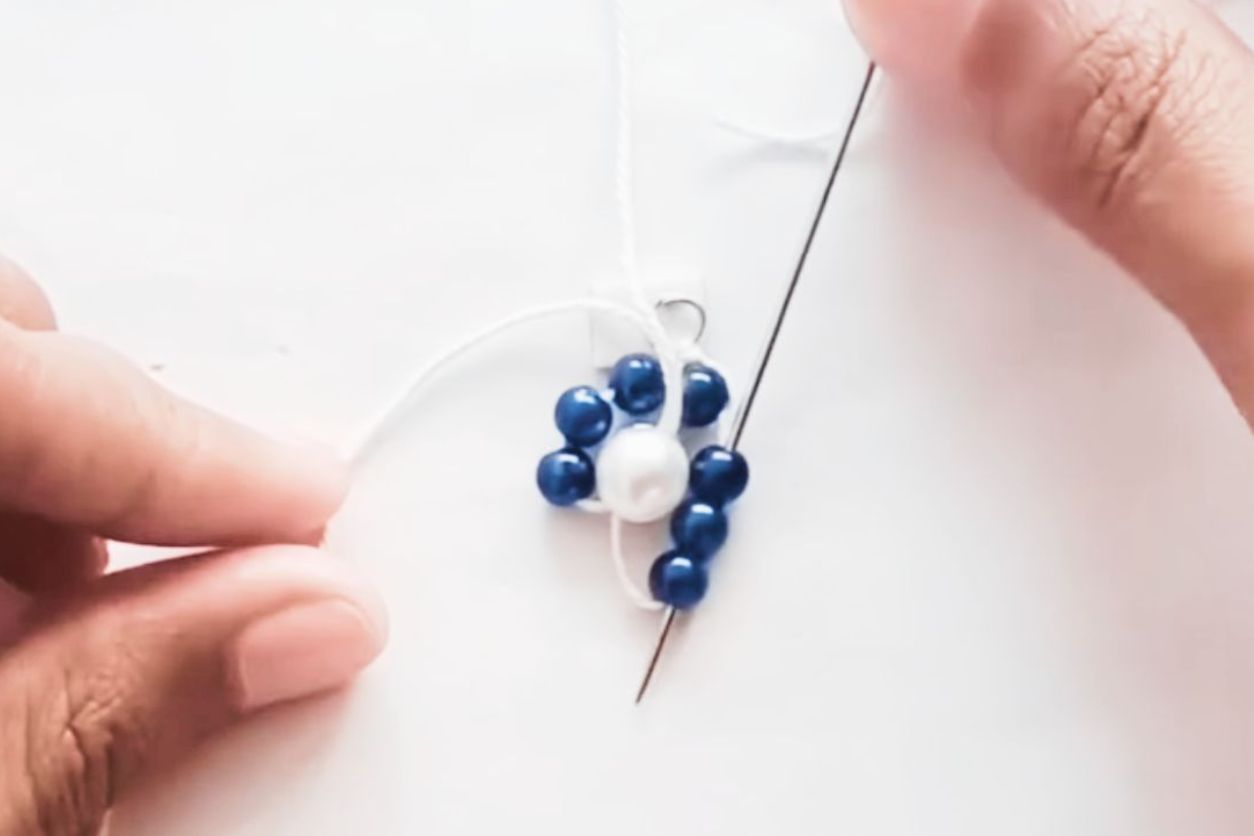
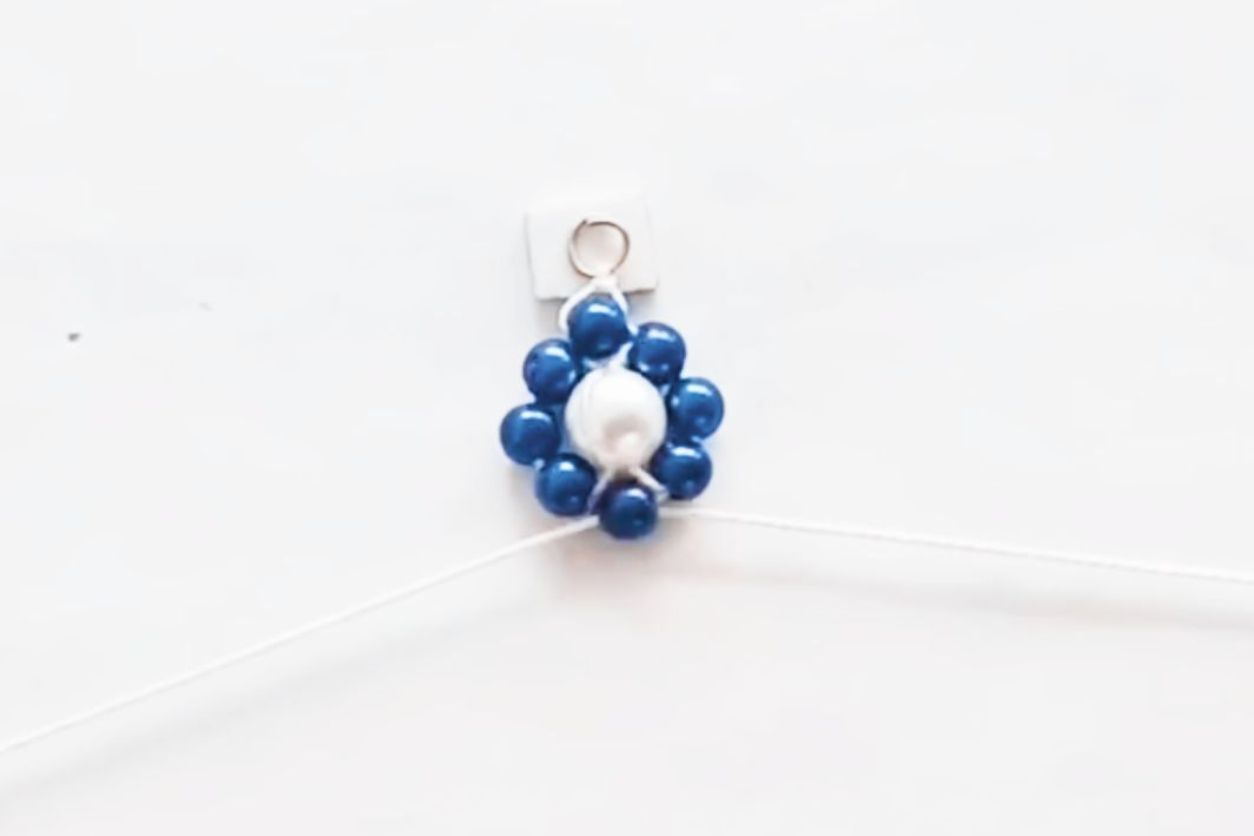
Add a little accent bead to both sides. Then, thread each cord end through a petal bead to restart the process. 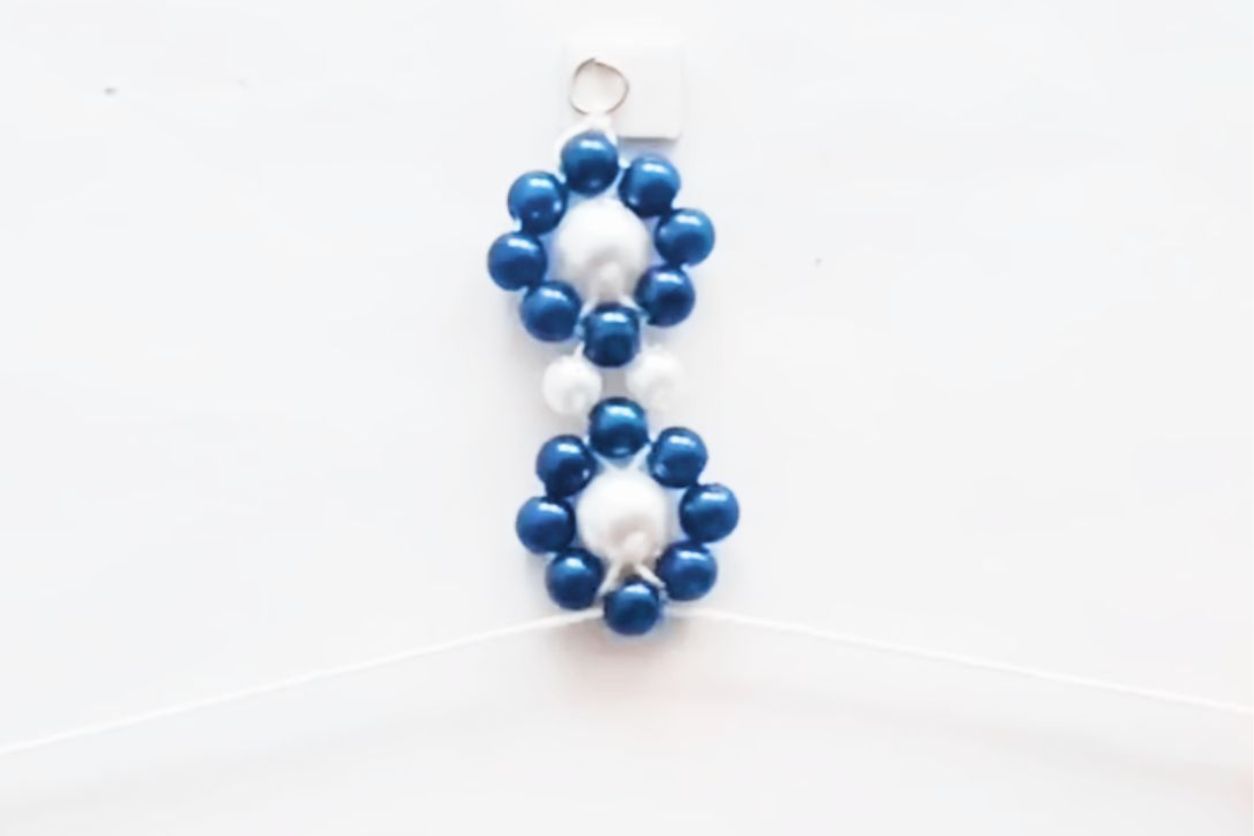
- Keep adding daisies until your bracelet reaches the desired length. Remember to periodically check the bracelet length by wrapping it around your wrist to ensure it fits comfortably.
Finish the Bracelet

- If Using Beading Wire:
- Add a Clasp: Thread the end of the wire through a crimp bead and the loop of a clasp. Use the crimping tool to flatten the crimp bead and secure the clasp in place. Trim any excess wire.
- Secure the Ends: Thread the remaining wire through a few beads for extra security before trimming off any excess.
- If Using Stretch Cord:
- Tie the Knot: Once your bracelet is at the desired length, tie a secure knot in the stretch cord. Make sure the knot is tight and positioned between beads to prevent it from becoming noticeable.
- Trim the Excess: Cut off any extra cord close to the knot. To reinforce the knot, you can add a small dab of clear nail polish and allow it to dry before trimming.
Final Thoughts
Making a daisy chain bead bracelet is a wonderful way to express your creativity and enjoy the satisfaction of creating something with your own hands. Once your bracelet is complete, give it a gentle shake to ensure all beads are securely in place. Whether you keep it for yourself or gift it to a loved one, this charming accessory is sure to add a pop of color to any outfit!
Trusted Insights from Artists
At Art Life Today, our passion for arts and crafts is at the heart of everything we do. We understand that the right tools and materials can make all the difference in your creative projects, so we take our responsibility as reviewers seriously. Our goal is to help you discover the best products that will inspire your creativity and bring your artistic visions to life.